October 30, 2008

October Team Wrap up

October was a very busy one for The {NewNew}!
We set
up a web presence to better organize who we are and our events. Look for this to be fuller developed over the next month - integrating our upcoming events and driving to traffic to our Handmade Cavalcade. Our Team Catalog was printed and shipped [Yippee!!!] and some of us met in person to give it some hand made finishing touches as we stuffed envelopes and shipped it out.

Blog
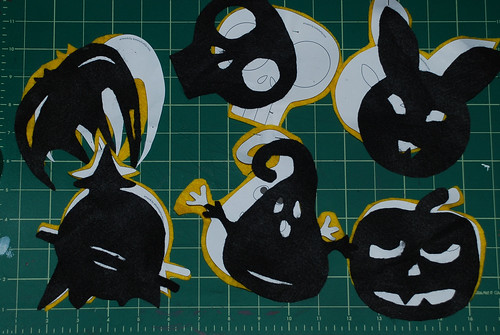
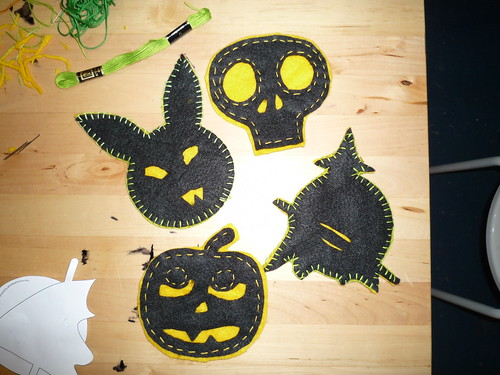
Our monthly theme was Indie fashion with a splash of Halloween How-To at the end from Luckx4, KarensMonsters and KimmChi. Other posts included product purple features from ThirdFloor, jewelry trends from CajaJewelry, beauty rituals from NordeaSoaperie, and mensweare features from Ikyoto. And how-tos from cakehouse, MShoelace, and BlueStitchBooks.

Contest:
Our Monday contests continued with earrings given away by SaltAndPaper, soap given away by DirtyLovesClean, a necklace given away by PulpSushi, and a monster given away by KarensMonsters.

Crafting for Charity:
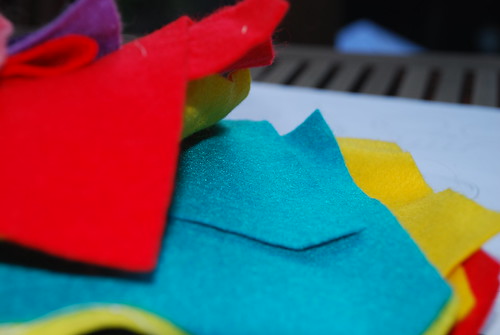
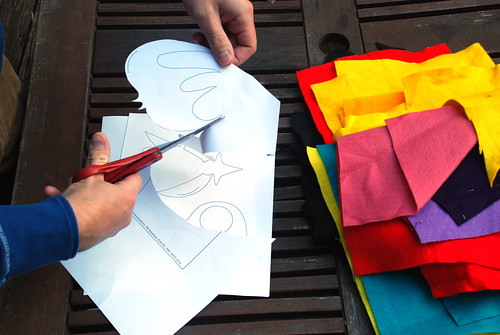
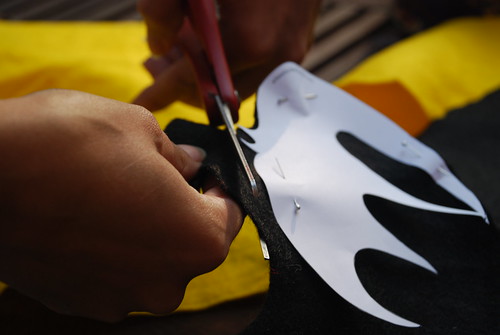
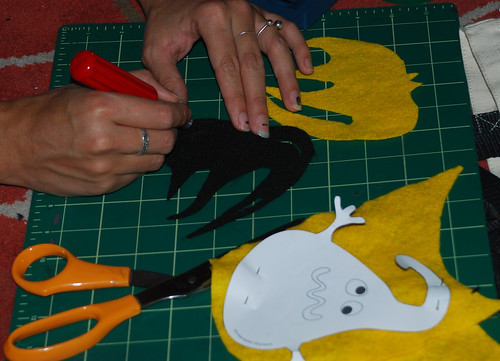
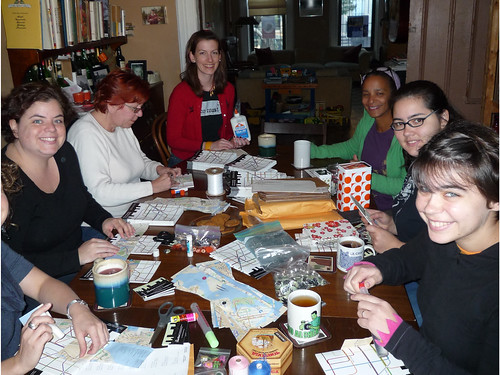
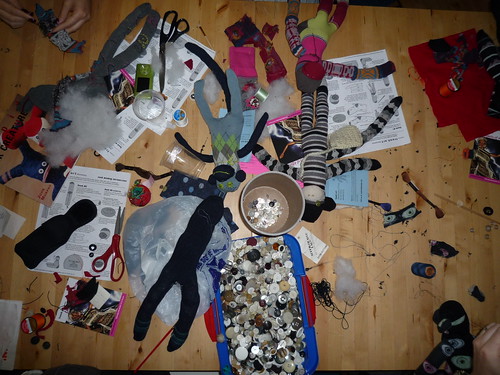
The team was finally able to put our craftiness to good use this month while volunteering to make Sock Monkeys with FreshArtNYC and Etsy Labs. It took about five hours of dedicated crafting to produce one little monkey - with each monkey going to FreshArt to be sold to fund their special needs arts programs throughout NYC. If you are interested, every other Monday they host sock monkey making in SOHO and they also accept donations of gently used art supplies - check out their website for more info - FreshArtNYC.org.

Live and in Person:
We rocked the Antic with several members pairing up and lining Atlantic Avenue in Brooklyn. PHOTOS

And we continue our rotation at the Brooklyn Flea - with some group participation at the Brooklyn Indie Market in the coming month.

Press:
October 8, 2008: Our Monday Giveaway is picked up by Craft Gossip
_______________

November we go full steam ahead!

On Nov 13 we explore a new sales medium - Virtual Trunk show! Login To Etsy at 7pm EST for deep discounts and chats with participating artists in the Virtual Labs NewNew Trunk Show Room.

On Nov 16 we partner with the local emerging designer market - Brooklyn Indie Market - to have a NewNew day at this Carrol Gardens staple.

More info in the coming weeks, but be sure to mark your calendars!

-Kimm
KimmChi.etsy.com


Black Widow Bling**


I like Halloween, but I've never been an over-the-top Halloween person. I prefer my costumes subtle and chic. In one short crafty afternoon, you too can sport this slightly creepy, but oh-so-cute sparkly spider & web for Halloween this year!

You will need:
• Spider pattern (download here!)
• Scraps of black fabric (the spider is small, so I say the sparklier the better)
• Big scraps of netting or lace
• 2 beads or sequins (Or embroidery thread if you are feeling ambitious!)
• flat-head bobby pin
• small amount of cotton/stuffing
• needle & thread
• hot glue gun (or other strong craft glue).

Cut out two spider bodies from your black fabric. Pin the spider bodies with right sides together. Stitch the two bodies together, leaving an opening about an inch long.
Turn the Spider body right side out and stuff.

Slip stitch the opening closed.


The spider legs are formed by folding a black pipe cleaner. Bend one pipe cleaner approximately 5/8” from one end and fold it back on itself. Twist this double-length slightly together.
Bend the pipe cleaner again at the base of the first leg and approximately 1 “ from the base. Twist this double length again. Repeat for the remaining two legs, but make these slightly longer.
You should have 3 or 4 inch inches of pipe cleaner left once you have folded 4 legs. Fold and gently twist this extra back around the base of the legs. This will help to stabilize the legs. You will also use this pipe cleaner “platform” to sew the legs to the body. Now shape the legs into a gentle curve.

Repeat this process with a second pipe cleaner to make a second set of 4 legs.

Stitch the two leg sets to the back/belly of the spider, just behind the head.

Cut two circles of netting or lace. One should be about 6" in diameter and the other should be 8"-10". Sew a smallish (1"-2") circle of loose running stitches in the center of each.
Draw the running stitches together to gather the circles into a ruffle. (I did each circle separately when I made my spider. If I were to make this again then I would sew/gather them simultaneously...a little less work!)

Flip the spider over and sew the gathered circles to his belly, over the legs. Sew several tight stitches to secure your thread, but don't cut it just yet.

Center the bobby pin over the gathers/spider belly and tack it down with a few stitches. This is just to hold it temporarily so that you can keep your fingers clear when you are gluing. I put the open end of the bobby pin towards the back of the spider because I wanted it to look like he was crawling down toward my face. Reverse this if you want him crawling up into your hair.
Sew small beads to the spider's face for eyes. You could also use sequins here—or go nuts and embroider a cool face!

Secure the bobby pin to the spider and her web with glue.

Happy Haunting!

**The geek in me feels the need to point out that she's not really a black widow unless you embroider that tell-tale fiddle shape on her back.

October 29, 2008

Coaster How-To

Halloween Coasters from the {NewNew} York Street Team

Basic Supplies:
-Sheets of felt
(mainly black + a contrasting color)
-Scissors or craft/exacto knife
-Embroidery floss in a bright color + needle

I like my craft projects quick and scalable! This Halloween themed coaster project is something you can keep very simple with the shapes provided and be done with some basic coasters within an hour, or you can really make them more durable by adding cork backs or even leather if you've got it, embellishing them with some embroidery via machine or hand, or even size them up to make placemats - it’s up to you!

The first thing I did was call out to members of The {NewNew} York Street Team to supply me with some scary silhouettes to work with. 6 Artists answered my call, supplying silhouetted artwork for a pumpkin (from CollectiveElements), ghost (from MayLuk), bat (from ME/KimmChi), bunny (yes, i said bunny) and skull (from Luckx4), and witch (by AlleneLaSpina).

All of this artwork, sized for coasters, can be downloaded HERE.

Choose the designs you want, or even make a set of all of one design.

Step 1:
Choose and print the designs you want. Use these as templates to cut the felt out. The size of the design files should be suitable for basic coasters if printed at 100%; for glasses with extra large bases you might want to scale these up a bit.


Step 2:
After you print out the templates, cut them out and pin them on to the color of felt you would like for your coasters. (I chose black for starters, but will cut them further and back them with a bright contrasting color in step 4).

Step 3:
After you have your desired number of designs cut out, use your exacto knife or scissors to add in details and design to the simple silhouette - making sure your accents are large enough to show through the cuts.

Step 4:
Use the templates you cut out in Step 2 to cut out more felt using nice bright colors which will be eye catching in contrast to the spooky black silhouettes. Pin these to the black silhouettes of the same design.
Step 5:
Using either hand embroidery or a machine, you can sew along the edges of the coasters in a nice bright contrasting thread - attaching the bottom layer as you go. For a great video tutorial on how to do the blanket stitch (the one around the bunny and witch CLICK HERE). You may have to press the whole thing with a hot iron when your done. And then you’ll have some spooky coasters to rest your spooky beverages on.

Optional:
If you want to make these coasters more durable, you can use these templates and a craft knife to cut the silhouettes from a roll of thin cork or even scrap leather. Back them up to the felt parts and use a good glue- gorilla glue or E600, press them together and let them sit overnight under a pile of heavy books. When they are dry, trim up any excess.

Thanks to CollectiveElements, MayLuk, KimmChi, Luckx4, and AlleneLaSpina for submitting designs!

And thanks to those that came out to the Etsy Labs for the craft night I hosted with this project on October 20 - that's you RedBridge and ThePeachTree - THANKS!

Download this whole tutorial in PDF format

-Kimm
KimmChi.etsy.com

October 28, 2008

Join our Mailing List

Want to stay informed of all of our Crafty happenings
in the New York Metro Region?


Join our Mailing list!
We send out special announcements about upcoming events throughout the New York Metro area from our vendors at local markets to events we are hosting and how you can come out and support local shopping in your neighborhood


Fill out your e-mail address to receive our newsletter!


October 27, 2008

How To Make Wings for your Halloween Costume

You can use these to make wings of all different shapes, sizes to suit your needs. I’m purposely making strangely small oddly shaped monster wings.

What you’ll need:
Wire hangers
Scissors
Panty hose (any color)
Glitter
Glue
Paint
Decorations: Fur, feathers, sequins, whatever you have
Elastic
Felt, fur, or other thick fabric
Sewing machine (optional)


Start with your two wire hangers. Shape them into a wing each. If you want bigger wings, try shaping your own from larger pieces of wire. If you’re using hangers, straighten the hook on each and wind them together.


Take a pair of panty hose, the color may determine what kind of wings these are, I’m using black. Don’t be shy to paint or dye the panty hose to get the desired effect.


Cut off the legs and stretch a leg over each wing. Pull the opening towards the center where the wings will connect together (at the hook part of the hanger).


Measure two strips of elastic of the same length around your arms and to the middle of your chest, comfortable, but with some tension.


Take two pieces of felt or fur (I’m using 4” x 4”) and glue or sew the two pieces together with the pantyhose, ends of the elastic loops and hook part of the hanger tucked inside. If you’re using a sewing machine like me, don’t try to sew over the wire hangers. Make sure that you sew over the pantyhose and elastic though, so they stay firmly in. Even if you’re gluing the two pieces, I recommend putting a few stitches in over the elastic bands the pantyhose, even by hand, for added security.


Now time to decorate! Glue, sew, paint your wings to your heart’s desire!


Try your new wings with a fairy dress, or a white gown and halo, or with butterfly antennae. If you’re like me, maybe you have some other purpose for wings. I can’t wait to finish my monster costume to try on with my new wings.

Karen
Karen's Monsters
karensmonsters.etsy.com

What are YOU doing for Halloween?

Oh so much to do in the city for Halloween! Here are some ideas if you are trying to scramble to get a Halloween costume together and hit the town.

Tonight at Etsy labs - is an Open craft night - the perfect opportunity to drop by and put the final seems on your costume. They will also have pumpkincarving tools on hand for those of you who happen to pick up an orangy goard on your way over - 325 Gold Street, Brooklyn (4-8pm)

On THURSDAY - October 30 - Threadbanger is hosting a Halloween Costume Bash at The Mercury Lounge at 8pm - complete with Janome giveway, organic treats and DIY giveaways. You can RSVP by emailing ThreadbangerParty@gmail.com to get on the guest list by tomorrow!

If you can't make it to that and still want to strut your stuff you can go to the annual Halloween Parade on FRIDAY October 31 - down Sixth Avenue - starting at 7pm.

The Park Slope Halloween Parade is from 6.30 to 8 down 7th Avenue.

If parades are not your thing - you can train it up to St. John the Divine on 112 street for their Halloween Extravaganza which will include projection of the Phantom of the Opera with organ accompaniment with a procession of ghouls afterward which includes the spooky puppets of Ralph Lee - shows at 7 and 10 - tickets are $15.

Know of any other Halloween parades going on in your local neighborhoods?

[NewNew Halloween themed merch here]

-Kimm
KimmChi.etsy.com

Monday Giveaway - Cutest Earrings ever!


It's MONDAY! Which means its time for our brand new Monday Giveaway. Each and Every Monday Stop by to enter to win something fabulous from members of The {NewNew} York Etsy team. This Monday we are proudly giving away a pair of Mosaic Dot Earings, from our very own Salt and Paper.

These earrings are part of her new dot mosaic collection. Little circles in tan and cream gather round a bright fuschia center tile on a base of coffee brown. They are made of expertly cured and finished polymer clay which makes them lightweight and easy to wear. simple and really stunning! Lovingly sanded and polished to a satiny, weathered finish with chunky beveled edges. hanging from hand-formed brass earwires.These are real mosaics! the tiles are individually cut and cured, assembled into a design, grouted, sanded and polished.

The disks measure approx 5/8" in diameter (1.5cm) and 1/8" thick (.3cm) and earrings measure approx 1 1/8" (3cm) from top of earwire to bottom of disk.

Natalie Wedeking is the Brooklyn-based designer/craftsperson behind Salt & Paper. She is inspired by mostly non-jewelry things: good package design, poster art, old marimekko patterns, William Morris wallpapers, scandinavian folk art, prefab housing, old book covers, vintage signage - pretty much anything made before 1975. In real life she is a graphic/package designer and the things she loves in graphic design - flat color, patterning, unusual color combinations - show up in her jewelry work. Natalie particularly likes to work in polymer clay, which gives her an opportunity to make completely unique jewelry elements from scratch. The medium lends itself to abstract florals and flat, graphic patterns like woodgrain. She layers it almost like paint, often very precisely and geometrically, but in flattening and finishing a piece, the nature of the clay takes over and the end results are unpredictable and very interesting.


How to Enter:

1. To enter to win, tell the world why you want these lovely earrings.
Post about your love of this product and your love of Salt and Paper on Myspace, Facebook, livejournal, wordpress, blogger, or your own personal blog or website.

2. Post a LINK back to your personal post right here in the comments section.


3. Entries can be submitted through 10pm Saturday, November 1, 2008.


4. Winners will be selected randomly and will be announced the following Monday with the New contest item.


5. To see the full legal contest rules click here.


Last weeks winner:

The winner of last weeks monster from Karen's Monsters goes to turtle.

Congrats to the winner and I hope you all enter this week!
Can't wait to see your posts! And stay tuned for next week's giveaway.


~jen pepper

peppersprouts.etsy.com

October 26, 2008

Purple Rain at the {NewNew}

One of the hot new colors this year is purple. Whether it is shades of eggplant, aubergine, amethyst, lilac or grape, purple is popping up everywhere, including on The {NewNew} team. Of course, this great color is showing up in the Indie fashion front.

You can wear it with these shirts from team members
Kimmchi
and east4thstreet.

Or carry your life in this eggplant bag by LaPistolera.
You can adorn yourself in fabulous jewelry like these earrings from Jantar and pulpsushi.
Or maybe this glamorous necklace from AdornmentsNYC.

For some fun purple, try this ring from Metalsugar.


Fashion is not the only place where we are seeing shades of purple.
Check out this fab lamp from YoursTrulyxxx.


Add these soy candles from Dewonapetal.


Who wouldn't want this bird from
littleloveblue decorating any part of their home?


Your skin will be happy to have these lovely
olive oil and cocoa butter soaps from ayelet17.


Purple is hitting the paper world, too.
Collect treasures, thoughts or creative ideas
in one of these great little scrapbooks from
Waisze or CollectiveElements.


Who wouldn't love to receive
one of these beautiful cards from
elbeescreations or fubabee.


And don't forget the kids with a
purple toy from KarensMonsters.
Patricia is my favorite!


Whatever your shade, let the purple rain fall!

Beth