August 31, 2011

Hurricanes, Earthquakes, Tornadoes, Oh my!

This past week, east coasters experienced some highly unusual weather.  First, an earthquake that was felt clear up to Canada and then hurricane Irene storming through with a tornado watch added on.  I do hope that you, all your friends and loved ones are safe, your power is back on, and that you experienced minimal (if any) damage to your homes and property.  A native New Yorker, I don't think I ever appreciated our great fortune of being spared by natural disasters as I do now.  In fact, everything seems to have been put into a much clearer perspective after thinking that everything you own could be swept away in a moment's time.

Being able to survive a weekend that could have been so much worse, losing a little power, some food in the fridge, hot water, and access to TV and electronics for a couple days seem like trivial inconveniences.  I realized during the earthquake that the only important thing to save, was in fact life.  The thought of saving anything besides yourself doesn't even come to mind for a second (and I mean, possessions like clothing, furniture, artwork, heirloom hand-me-downs, paperwork, etc.).  I couldn't believe how selfish my first reaction was.  When standing in your hallway and everything around you begins to shake and rattle, you just want to get out as soon as possible (hoping you're fully clothed when it happens).

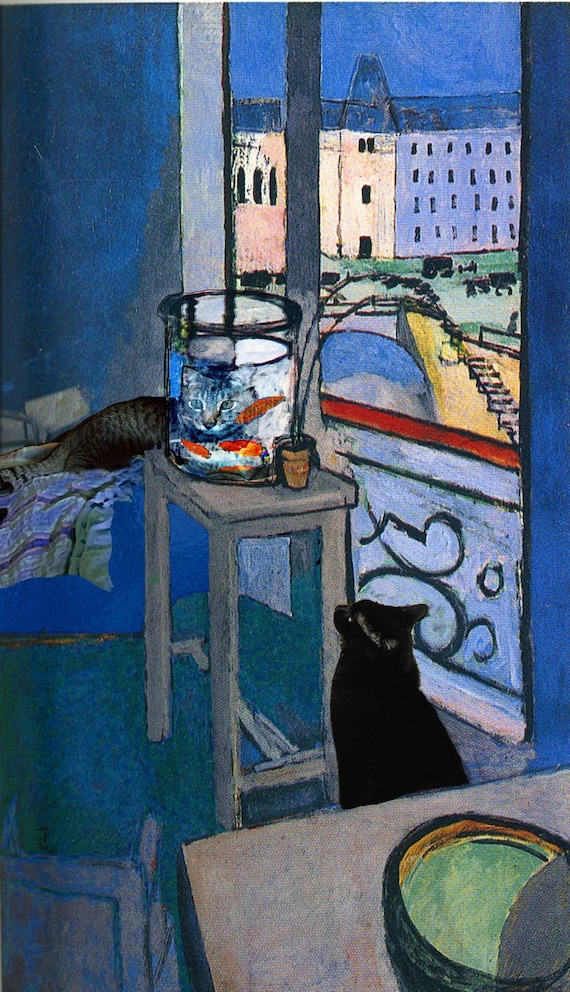
A view from my window the morning after the rain.  The Hudson River and the NJ Palisades across.

With hurricane evacuations and worst-case-scenarios being talked about, you can just hope that you won't be in harm's way.  Some things that I learned if you should ever be in a similar predicament is to do the following:

--If you normally park your car on the street, before a storm hits, find a relatively safe place away from tall trees
--They say to fill your bathtub full of water in case your water supply gets shut off.  I found that my bathtub stopper doesn't work... so investing in a plastic stopper would be wise just in case.  Having extra water would come handy for washing and for filling up your toilet to flush.
--Keeping ice in your freezer if the power should go out.  Any freezer-safe pie dish or bowl can be filled up with water ahead of time, even ziploc bags (although mine were imitation and leaked water right away)
--When stocking up with food and batteries, do not forget toilet paper to your list.  Also, if your power goes out, it's pretty pointless to have tons of raw meat or poultry in your fridge unless you remove and cook it right away.  Try to load up on bottled water, canned food, and fruit/vegies instead of anything that has to be refrigerated if possible.
--If your power goes out, but you have a gas stove -- you can still cook!  Just turn your dial on and use a match, and voila!
--Taping up your windows was a big thing here in NYC.  Although, I'm sure that using wimpy tape like blue painter's tape is also totally pointless.  I would stick to industrial grade duct tape or gaffers if you must.
--Having copies/scans of all your important documents saved onto a cd (IDs, medical records, taxes, etc.)
--Having a back up or two of anything important on your computer
--Having a stash of cash on handing case you need to just get up and go
--Having a plan B in case you must evacuate or your power does go out -- it's really great to have friends or family you can go to in these types of circumstances.  (Thanks B&J!)

If you have any tips or advice you would like to share so we can all be more prepared in-the-case-of-the-case there's a next time, we would be so appreciative.  Best wishes to all!

Virginia

August 29, 2011

Is it Possible to Create Eco-Friendly and Sustainable Business Through Art?

Personally, I think there are a lot of answers to this question depending on who is asked, which is why my goal in this series is to get answers by asking artists directly.

If we look at big business, the answer to many may be a resounding no, but what about small businesses? Every business starts as a small business. Does this mean that the fate of a small vendor on Etsy will be the same as a large corporation?

As a seller on Etsy and an artist, I believe that my business and art are both eco-friendly and sustainable, yet, I’m realistic in knowing that at the very beginning it is hard to always do the right thing and be the most eco-friendly business owner. For example, I have yet to plant trees as a way to give back to the earth for the trees used to create the paper I use to make invitations. The one thing I’ve learned, however, is when a business owner makes the decision to stick to their beliefs, businesses are shaped and developed accordingly.

Before interviewing artists, I decided to research the term “sustainability” since it is the key word in the "green" movement, but what does it mean?

I came across these three definitions that I think help shed some light:

  • Sustainability embodies "stewardship" and "design with nature," well established goals of the design professions and "carrying capacity," a highly developed modeling technique used by scientists and planners. The most popular definition of sustainability can be traced to a 1987 UN conference. It defined sustainable developments as those that "meet present needs without compromising the ability of future generations to meet their needs"(WECD, 1987). Robert Gillman, editor of the In Context magazine,extends this goal oriented definition by stating "sustainability refers to a very old and simple concept (The Golden Rule)...do onto future generations as you would have them do onto you.” (http://www.arch.wsu.edu/09%20publications/sustain/defnsust.htm)
  • Sustainability is the capacity to endure. Sustainability interfaces with economics through the social and ecological consequences of economic activity. Moving towards sustainability is also a social challenge that entails, among other factors, international and national law, urban planning and transport, local and individual lifestyles and ethical consumerism. Ways of living more sustainably can take many forms from reorganising living conditions (e.g., ecovillages, eco-municipalities and sustainable cities), to reappraising work practices (e.g. using permaculture, green building, sustainable agriculture), or developing new technologies that reduce the consumption of resources.” (http://en.wikipedia.org/wiki/Sustainability)
  • Finally, according to the United States EPA (Environmental Protection Agency): “Sustainability is based on a simple principle: Everything that we need for our survival and well-being depends, either directly or indirectly, on our natural environment. Sustainability creates and maintains the conditions under which humans and nature can exist in productive harmony, that permit fulfilling the social, economic and other requirements of present and future generations. Sustainability is important to making sure that we have and will continue to have, the water, materials, and resources to protect human health and our environment.(http://www.epa.gov/sustainability/basicinfo.htm#sustainability)


Whew, that’s a lot! I get the over all meaning thanks to these three definitions, but what does it mean for artists and the growing industry of hand-crafted goods that you find on Etsy and at fairs?Also how can you know to trust what someone says when the word is used for every industry and good on the shelves?

That's where this column comes in! As a new {NewNew} blogger, I intend to be your eco-friendly and sustainability writer, covering topics such as how artists, business owners and Etsians create with the ever-growing issues of consumerism, the economy, climate change, and unsustainable business practices and their effect on natural resources.

In coming issues, I’ll post interviews and stories from artists directly-introducing their different styles and approaches to their art and these issues. Also, I’m extremely interested in hearing ideas from you readers; so please share any and all thoughts on the shift of business as eco and sustainable issues make demands, especially as the handmade industry continues to pick up steam and chug away.

Until September!

Sara//

S2 Stationery and Design

Handstamping: A Tutorial

Hello there, New New Blog readers! I'm Kerry - a new contributor here. My Etsy shop is K. Batty Design & Stationery (or kbatty.etsy.com) & it's filled with personalized stationery, custom invitations, greeting cards & a few other paper products coming soon. Many of the items in my shop are hand stamped so I thought I'd kick off with that - a little tutorial on hand stamping with a simple one-stamp greeting card. Heeeeeeere we go...


Supplies: a CLEAN rubber or polymer stamp, a CLEAN ink pad (not something your toddler has been playing with - you know how they are with the paints...), something to stamp on – for this tutorial, as I said, we’re hand-stamping a card, but you could easily personalize notepads, notebooks, gift tags, address labels…you get what I'm saying. You can purchase any of these things at your local craft or stationery store.


Step 1: Prepare your surface – any flat surface will do. Make sure it’s clean - let’s not get the jelly from your morning toast on your project. I like to stamp on my cutting mat..


Step 2: Placement - Decide a head of time where you’re going to place your design. Line up your clean stamp on your paper until you get a design/placement that you like.


Step 3: Ink up! Lightly dab your stamp around the pad. Check your edges for over inking (places where the ink pools in your design or on the stamping block, like that spot on the right side of my stamp. Oops!).


Step 4: Stamp! Use even pressure on the stamp, particularly in the center if it’s a large stamp like this one. Avoid “mashing” the stamp on the paper – the design will look fuzzy & bloated. Oh! This is why I like using my cutting mat. I use the grid to help line up my stamp on the paper.


Step 5: Let it dry! As you stamp, carefully move your pieces aside to dry. Some colors will dry quickly; others take a while, particularly the metallic inks so be patient. Don't smudge it! Also, some surfaces/papers will absorb ink faster than others. Just leave your project on your work surface while you go on to the next step…


Step 6: Clean up! Cover your ink pads first to help keep them from drying out, ensuring a long life for your stamp pad. Wash your stamps & leave them to dry. Usually, I just wash my stamps with water, especially if I get to the sink as soon as I’ve stamped, but it depends on the ink you’re using. Some of it can be a little stubborn, especially if you have been stamping a lot of pieces.


Ta-da! You have a greeting card (or any other paper-product you can dream up)! All you need is an envelope, which can also be stamped if you want. It’s relatively easy & quick but takes some preparation & practice to do it consistently. If you’re a newbie, definitely practice your impression & alignment on a scrap piece before you move to your stamp surface.


Questions or comments? Leave them here & please do report back on what you create! Happy Stamping!

August 26, 2011

Hats for Young Runners

The New York Road Runners is not only a premier running organization for adults, they also offer extensive programming for children. Their Young Runners program is a free after-school program available to underserved communities in New York City. Their Mighty Milers program teaches kids of all fitness levels and abilities how to run or walk a half-mile, two to five times a week.

When The {NewNew} found out about a drive that combined the passion of quite a few of our members namely running and knitting, they were excited to commit their time to knit up hats for some of the neediest participants in the New York Road Runner Youth programs. Modeled by some of our "honorary" members, here are the first hats about to be delivered to the NYRR.


If this inspires you to donate some of your time to a charity crafting project, check out Lion Brand Yarn's Charity Connection hub where you can find out about charity projects in your community.

Happy Crafting

Simone
groundsel.etsy.com

August 23, 2011

Painting on Glass


I use small glass tiles to make decoupage magnets. Perhaps unsurprisingly, not every tile is fit to be used in this way. Scratches, scuff marks, bubbles and occasionally nicks and pock marks mar the glass, and consequently, any image glued to it.


Not being one to throw things away, I've amassed a large number of glass tiles that are unusable as such. But it's not that I have an unhealthy attachment to useless stuff, I really and truly believe I can use these dud tiles, either for something other than magnets, or for magnets but in a different way. With storage space running short and numbers of flawed tiles growing large, I've stepped up trying out different ideas on both fronts.

One of the more successful alternative ways I've used dud tiles to make magnets is to paint them with acrylic paint. Abstract designs and patterns do the best job of obscuring scratches and the like, so I've painted the backs of the tiles with them, just as I would otherwise decoupage them with images. Aesthetically, this trick works pretty well. But in terms of craftsmanship it has at least one fatal flaw: Unlike paper, paint can be peeled off the glass. Even when it's finished with a sealant, it doesn't take more than a few scratches with a dull fingernail to pull the whole design off.

If I weren't making my magnets to sell this might not be a fatal flaw. I mean, who would really try to pull a painted design off the back of glass a tile magnet? Probably no one, but you never know. So I had to work out the kinks.

Leafing through the Dick Blick catalog one day, I happened upon heat-tempered paints. Ah-ha! A solution to my non-sticking acrylic paint-on-glass problem, perhaps! It required re-thinking my magnet-making technique, but hooray, it panned out. Hooray indeed. I love work-arounds. I really do. You have no idea.


In any case, the re-think entailed shifting the site of the design from the back of the tile to the front. A little more research led me to the paint I chose to work with, namely, Folk Art Enamels. It turned out to be very much like the soft body acrylics I know and love. But there are a few key differences to note for the especially interested: First, Folk Art Enamel dries much more slowly than typical acrylic paint. I messed up more than a few designs before learning this, so resist the urge to add coats or layers of details as soon as you might otherwise. Second, I found that softer bristle brushes worked better for distributing the paint evenly than springier bristle brushes (this may not apply to surfaces that are less slick than glass). Third, which may not be so much of a difference but I think is worth noting anyway, is that in terms of opacity-translucency, the colors I used to paint my glass tiles, at least, tended toward translucency. Bold designs, perhaps on glass in general, will therefore require multiple coats.

My first painted tile and intro to the opacity-translucency of the paint, visible here in the green and red stripes.
Different kinds of designs.
Solid color backgrounds with with dot- or dab-based details worked especially well.

The final key difference between standard acrylic and this paint, of course, is that it's heat-set (you can also allow it to air-dry but it takes 21 days -- ack!). Once you've got your glass all painted up nice and pretty, you bake it in the oven. Neat! For this particular brand of paint, you need to let your pieces air dry for about an hour, then put them in a cold oven, heat it to 350 F, bake for 30 minutes, and allow to cool in the oven before removing.

Finished pieces with magnets freshly glued to their backs.

And there you go --- a pretty easy, non-peeling painted-design solution to using flawed glass tiles for magnets --- and probably many other things besides! I shall be experimenting.

Until next time --

Have fun!


Linda

August 18, 2011

DIY: And all, that, jazz!


This weekend is the Jazz Age Lawn Party on Governor's Island and I couldn't be more excited! Following The Sartorialist's coverage of the event each year, I know I can't take the suggested 20's attire lightly. A quick search of pricing for authentic 20's attire on ebay made me realize this was going to be a DIY project.

beautiful gown decorated with ostrich feathers

After a lot of research on period clothing, I found this absolutely gorgeous dress in the Vogue archives from 1924 that I wanted to replicate. Now, I'm not some amazing seamstress, but I'm pretty crafty so I knew I could come up with something.

I traced the dress on the back of wrapping paper to make a cheap (free!) and easy pattern

You start with a plain tank style dress. I copied a dress that I currently have that has a more straight shape that is in line with the trends of the time. You have to have room in the dress to dance to all that jazz music. I extended the hem a little as you want the hem of the dress to come right to your knees.

pinned on feather fringe!

Find a fringe that is about 5 inches in length. I went with this feather fringe that I found at Mood. If feathers aren't your thing, there are endless trimmings stores in the Fashion District. Pin the fringe around the hem of the dress so it overlaps the bottom just a little bit. Sew (or fabric glue!) the fringe in place. Place another layer of fringe slightly overlapping the first and sew or glue in to place. Repeat with a third layer and you're DONE! Wasn't that easy?


Accessorize with this pretty fascinator from ArtikalNYC, a few strands of pearls, berry lipstick and a 20's appropriate bob and you'll be the belle of the ball! I'll be sure to share some photos from the event on our Facebook page when I'm all dolled up, so be sure to head over an "Like" the {NewNew} so you can see my work in action!

the finished product! I can't wait to wear it!

While you're on Governor's Island, be sure to stop by the Better than Jam Pop-Up and pick up some great {NewNew} goods!

Kelley //

August 17, 2011

Work Out with the NewNew

Lately the weather in NYC has been perfect for enjoying the great outdoors and getting some exercise. Here are some picks from your very own {NewNew} team, reminding you to keep your body and soul healthy.

Know any marathon runners? Celebrate them with a beautiful place to keep their marathon medal.

Everyone needs a little reminder sometimes...

Show the world you love your bike with their cool hand sewn silk ties.


Remind yourself to get your blood pumping!

Keep warm and in style on those cool early morning runs with this lovely slouchy hat.

Enjoy the wonderful weather!


Karina

August 14, 2011

{NewNew} Returns to Boston for SOWA!

The {NewNew}ers are coming! The {NewNew}ers are coming! Join a bunch of us as we head to Beantown on Sunday, August 28 as guest vendors at the SOWA Open Market, Boston's original art and indie designer market. Located in the beautiful Back Bay area, this is a real destination market. There are over 100 juried booths selling jewelry, clothing, accessories, art and photography, housewares, ceramics, etc. Right next to the craft market are an antiques market and a farmer's market where in addition to produce, there are artisan cheeses, breads, and desserts. And if that isn't enough, Boston has caught food truck fever and there is a rotating schedule of food trucks! The market is open from 10am-4pm and you can easily spend several hours. Here are some of the {NewNew} team members you can expect to see.

Gorgeous photography by kgudahl.
Bath and body essentials from NordeaSoaperie, such as this refreshing Cucumber Aloe Body Bar.
Beautiful, natural stone-based jewelry from Chelsea Rainbow.
Overall Baby's adorable kid's overalls, shortalls, and skirtalls:
Gorgeous lampworked beads by A Studio by the Sea:
Whimsical magnets, plush toys, and pendants from Purty Bird:
As a cat fanatic, I deeply appreciate Deborah Julian's cat-centric cards, paintings and magnets:
Enchantragirl's delicate and feminine jewelry:
Ingenious upcycled lamps by Merrimack and Monitor:
Unique jewelry, such as this money locket, by Absynthe Jewelry:
And finally, light switch covers from
today's blogger LuCrafts!

August 12, 2011

Tutorial: Beach Decoupage


I just came back from a week at the beach and am trying to hold on to a bit of that vacation feel while sorting through photographs and adding to our shell collection. In this process I decided to combine the two by decoupaging a picture of our beach shack to one of the shells we found on the beach right in front of the same house.


For this project you will need:
  • A clean shell - this particular shell is approximately 3 inches by 5.5 inches
  • An image - I photoshopped a picture of the shack using this tutorial. You could also cut out an image from a pretty paper napkin
  • A sheet of printable fabric
  • Mod Podge or a similar type of glue
  • Acrylic gloss or lacquer
Measure your shell and determine how large your image should be. Using a photo editing program or a copy machine, size your photo accordingly.

 
Print your image onto the printable fabric (you may want to print it on plain paper first to check whether the sizing is accurate). Make sure there's enough white space around the printed image so you can cover the entire front of the shell.
  

Cut out the image and remove the paper backing from the printable fabric.


Paint a coat of Mode Podge onto the shell.


Place your image onto the shell and adjust it until you're happy with the way it looks.


Paint a thin coat of Mod Podge onto your project and let it dry completely. Repeat five or six times to seal the image.

 
Trim the fabric flush with the edge of the shell.

Because Mod Podge often stays a little tacky, I like to seal the whole thing front and back with varnish. Here's my vacation memory ready for a shelf.


Happy Summer!

Simone
groundsel.etsy.com