
 recently the towel that my husband has been using since college (!) sustained some injuries that made it unusable:
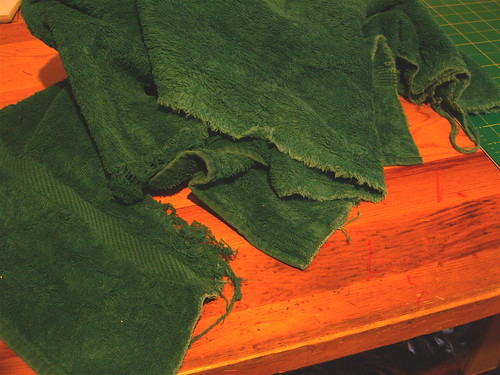
unusable as a towel, that is. as the base for a new bath mat, it was perfect. and so i embarked on a project to dress up our bathroom.
materials:
- an old towel
- a yard or so of fabric that you'd like to place your just-out-of-the-shower feet on [i used the ruffle from an old bedspread]
- pins
- needle and thread, or sewing machine
method:
1) cut your towel into two equal-sized rectangles, at whatever size will fit best in your bathroom.

2) iron your fabric, and cut it into strips that are 4-1/2" wide, and 4" longer than the sides of your rectangle in length (so, unless you've cut squares out of your towel, you'll have 2 strips of one length and 2 strips of another).
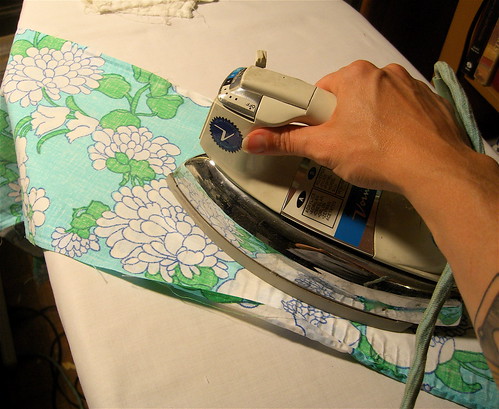
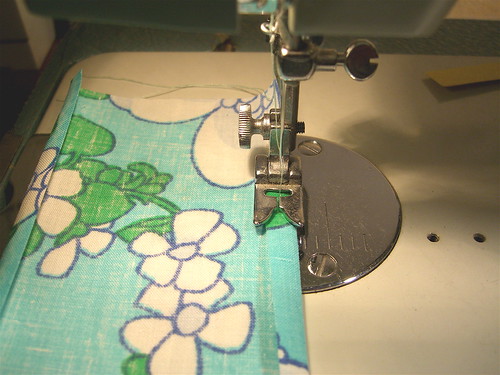
3) iron down a 1/4" fold on each of the long sides of the strips, then fold in half and iron the whole strip flat, until it looks like this:
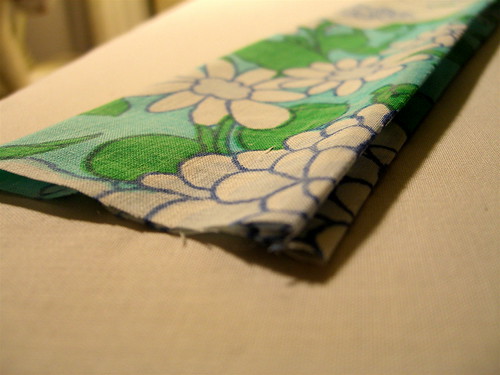
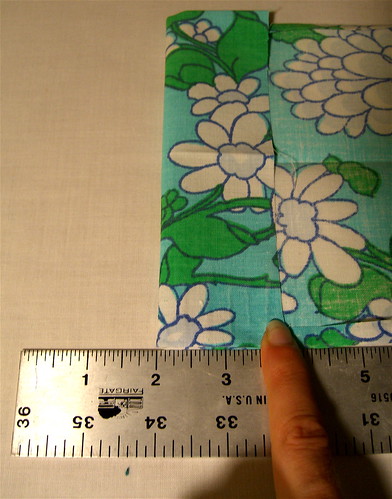
then fold back 2" at the short ends of each strip, and iron down.
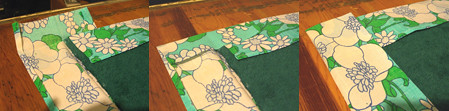
4) place the two rectangles of towel on top of each other, lined up neatly. then place the strips of fabric under the edges of the towels and fold them over at the crease that you ironed in, so that they create a border. follow the photos below to make neat corners:
5) if you like the way it looks at this point, just sew a straight stitch along the inside edges of the border, being sure that you catch both the front and back edges, and you're all done!
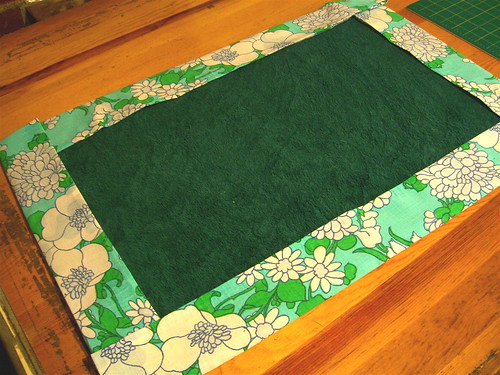
6) however if, like me, you're not crazy about the color of your towel, or just want more of the fabric in the design, or just want to make life more difficult for yourself, you can keep going. i decided to fill in the middle with a lattice design, like the back of an old lawn chair. if you are going to go this route, don't sew that broder fabric down just yet....

start by cutting a bunch of strips of fabric in a width that looks appealing to you (i used 2"). remember to add a 1/2" to that width for finishing the edges. measure the open space of your mat that you need to fill, and figure out how many strips you need to cut to fill it. for length, cut them an inch longer than the open space, to allow for them to overlap (or, acutally, underlap) with the border fabric.
iron down a 1/4" on each of the long sides of the strips, then sew them down with a straight or zig-zag stitch.
**if you are working with a fabric that's prone to fraying, add 1" to the width that you decide on for the strips, and fold the edges of the fabric over on themselves again before sewing down.
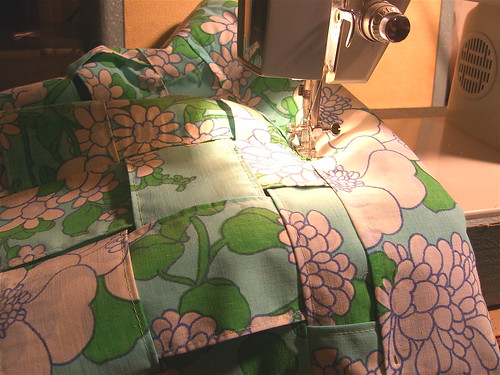
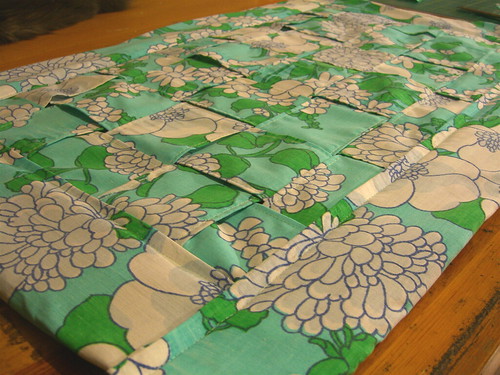
7) weave the strips together...
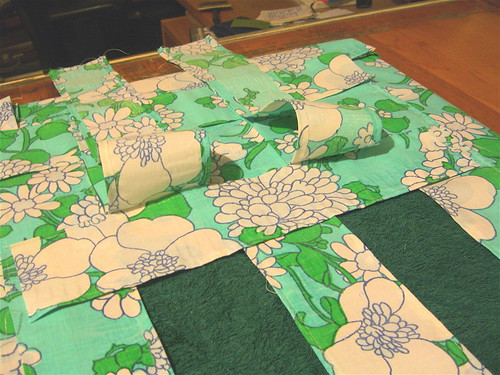
...pin them around the edges, and baste them to the towels.
8) then put the border fabric back in place, fold it over the lattice, and pin it down. sew a straight stitch along the inside edges of the trim, being sure that you go through both the front and back edges.
and that's all!
 - cakehouse
38 comments:
So pretty and inspiring!
I saw this in your flickr pool and was wondering what you were up to! Looks great!
That's beautiful and very resourceful!
That's fantastic! Where is the drop off for my ripped towel?
:-)))
Awesome idea! I could see doing this with other old fabrics for mats around the house (in front of the sink, at the back door, etc.). Thanks for the great tutorial!
This is the best homemade bathmat I think I've seen. Thank you for sharing!!!
oh what a great idea - i do need something for at the kitchen sink - or def at the cutting board in the kitchen
wow...a towel since college! he really must love it...great idea! i really need to get myself a sewing machine!
What a great idea. Thanks so much! I always wondered what to do with old towels and now I do!!
As soon as I saw this on the Craftzine blog, I *knew* it was your handiwork. :) Congrats on the mention! And awesome bathmat!
This is so pretty... and its awesome for a new idea for a recycled project!
What an awesome idea! Great tutorial, thanks Kristen for posting it!
What a great idea! I like the towel with border idea, too. Thanks for a great tutorial!
Great idea! You clever people amaze me!
This is a marvelous idea - love it and will give it a go.
What a great idea! i have lots of old towels. Very inspiring!
hugs ginger
adorable!
This project is GENIUS! I'll be linking to this.
What a great idea!
Gordon Bennet!
ciao
truly a beautifulst idea.
realized also much good.
it compliments for this job and yours blog.
ciao ciao
annapaola italy
That's like magic to me :) Awesome.
Do you have a way to make it nonskid?
hi christense -
just saw your comment---luckily it really hasn't skidded too much in it's current state, but if you'd like to be totally sure, you could stick some of those nonskid bath decals on the bottom.
p.s. i just ran mine thru the washer for the first time and it came out just as good as new...
Hi there! I just wanted to thank you for sharing this one! I found it on Sew, Mama, Sew!'s blog and made a bath-mat this afternoon! My sister dyes my niece's hair and turned one of my towels purple in a couple places (Yes, we had fun!). I turned the dyed parts to the inside and added some Hawaiian print to the edges and it is so cute! Thanks again!
Cute idea! I'm concerned about someone hooking their toe underneath the lattice rows and falling. I know that is exactly what my husband would do if I had it in our bathroom.
I am combing through SMS's archives and came across this wonderful idea. Thanks for the idea. In fact I think I will make a bath mat with the old towels, when I get new ones, and sew a strip of the same fabric to the new towels so it looks like a set.
Hello
Would you please tell me if you found the mat slippery? If so, what did you do? I want to go as far as step 5.
Thank you B.
Very neat tutorial, thanks for sharing! My daughter has a Dallas Cowboys bathroom and I have some yardage I bought for the back of her quilt, she isnt thrilled about this fabric but did agree to use part of it for a border on the shower curtain, I can make her this rug to match!
Great idea!
If you are worried about toes getting caught in the lattice work you can sticth down each piece or put strips of a product like heat and bond to hold it down. For skid purposes I had a piece of rubber padding like the kind you put under a regular rug to keep it from slipping and used it as an added layer to the bottom. It washes well so far.
I love this idea! I need a new bath mat (the rug was cheap and needed quickly). Thank you for sharing this idea.
Love this...just tried it, and looks great!
Love this. I've been searching ideas for my guest/daughter's bathroom. I wanted to do something different than the store bought (cause one wash with those and they stat falling apart). I believe I'm gonna do this for my master bath also. This way I can make everything match. Thanks for the inspiration!!!
They also make a non slipping spray for this and for socks. Look at the craft stores.
Love this bath mat, think i will make a bedside mat though instead
At the rate my dogs chew up things, this would be a great money saver. When i was taking a shower last night I saw my bathmat being slowly pulled out of the bathroom. By the time I grabbed a towel and got out it was history.
Well now, that's kinda awesome!!!
For non-skid purposes, sew some of that rubber shelf liner that you can buy from the dollar store onto the bottom :)
Post a Comment