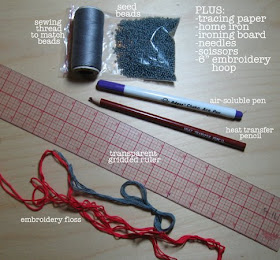
1. Embroidery Floss.
2. Seed Beads.
3. Regular sewing thread in a color that matches your beads.
4. A heat-transfer pencil.
5. An air-soluble pen (a pen that makes a mark which will disappear in a day or so).
6. A transparent gridded ruler.
PLUS, tracing paper, scissors, a home iron, fabric to embroider your design onto, and an embroidery hoop. For this project I used a 6" hoop.
STEP 1: Trace your design onto tracing paper using the heat transfer pencil. I chose an eight pointed star - you can choose pretty much any image you like, as this technique works well for filling any simple shape.

STEP 2: Iron the design onto your fabric. Use the hottest setting that will work for your chosen fabric, turn the steam setting to "off," and do not let your design shift while ironing. My design was transfered after about ten seconds of ironing.

STEP 3: Outline your design using any stitch you like. I chose to use the Stem Stitch, which is illustrated below. For this project, I did my stitching with three strands of embroidery floss. A handy set of illustrations for various outline stitches can be found here.
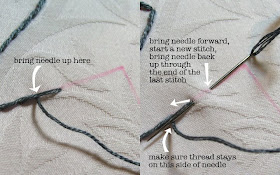
STEP 4: You are going to run a series of parallel threads over the entirety of your design. I chose a distance of 3/8". Using your transparent gridded ruler, make small dots right next to your outline, indicating where your parallel stitches should be placed. The ink should disappear in a day or so, but it's still best to keep your marks as small as possible.
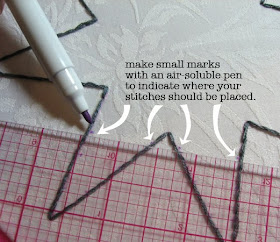
STEP 5: Using the marks you've made, create a series of long parallel stitches that fill up your entire shape.


STEP 6: Decide whether you would like to end up with a shape filled with squares or diamonds. If you want squares, you should make your second set of parallel stitches at a 90 degree angle to the first set. I decided I wanted diamonds, so I chose a random angle, and simply made all my stitches parallel to the first line that I made at random.
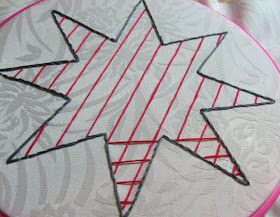
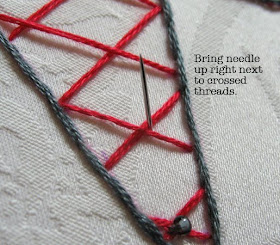
STEP 7: Once you have filled your entire shape with a grid of long stitches, you can start adding the beads. Thread your needle with a double strand of regular sewing thread, then bring your needle up through the fabric right next to the place where two threads cross.
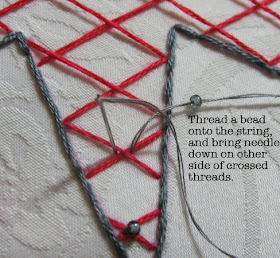
Thread a bead onto your string, and bring your needle back down through the fabric on the opposite side of the crossed threads.
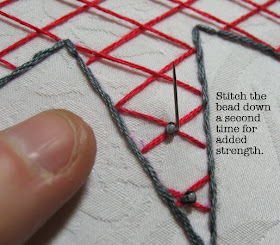
To make sure your beads are securely stitched onto the fabric, bring your needle back up, and make a second stitch through each bead before moving on to anchor the next intersection of threads. Keep going until you've tacked down all your threads.
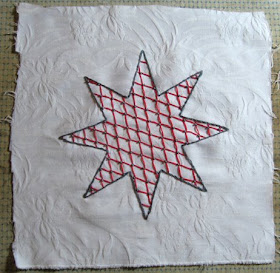
STEP 8: Admire the beauty!

I'm so impressed at this very detailed tutorial. I love that adding beads to your embroidery opens up a lot of options as well.
ReplyDeleteThis is wonderful! I love the tutorials here. The pictures are always fantastic and so well-explained. Thanks so much, I'll be linking.
ReplyDeleteVery clear explanations, great photos! It looks fun and accessible even to me (definitely not an embroidery expert).
ReplyDeleteStep 8 is my favorite step. The tutorial is very clear and the project looks enticing. Thanks for the post.
ReplyDeleteNice tutorial! I found it via twitter! I love working a lattice filling, but I never thought of doing it with beads. Very nice!
ReplyDeleteThis is so cool.
ReplyDeleteOooh cool, the finished product looks like it would be more complicated to make. Thanks for the detailed photos and instructions!
ReplyDeleteGreat tutorial! The final product looks so cool with the beads.
ReplyDelete