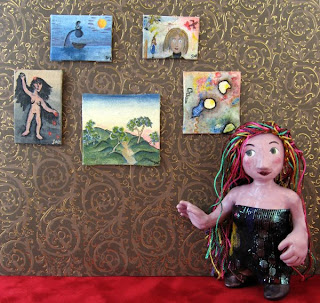
This tutorial will teach you how to make dollhouse-sized blank artists' canvases from empty tissue, granola bar and cereal boxes, which you can then paint and add to friends' art collections. I am hoping I can spark a whole trendy miniature painting craze!
Here's what you will need:
-empty boxes made from thin cardboard that you otherwise would have tossed into the recycling
-muslin fabric
-white glue
-acrylic gesso
-a normal size brush for applying the gesso, plus teeny tiny ones for doing the actual painting
-acrylic paints
-a gridded acrylic ruler is helpful for making accurate right angles when cutting up your boxes
Step 1: Figure out what size you want your miniature canvas to be. You can just eyeball the size if you like, but if you want it to be the perfect size to fit into a dollhouse, you'll want to do a little math. The standard size for dollhouse accessories is 1/12 scale, which means that you want to divide all your regular measurements by 12. If the full-sized painting would be 18 by 24 inches, then you want to make your mini canvas 1 and 1/2 inches by 2 inches.
Step 2: Once you have cut your cardboard to size, spread it with a thin layer of white glue and stick it to a piece of muslin. Make sure that the sides of your canvas are parallel to the grain of the fabric.
Step 3: Fold the fabric around to the back of the canvas and glue it down.
Make sure the folded fabric edge is glued slightly inside the edges of the cardboard so it can't be seen from the front.
Step 4: When your glue has dried, paint your canvas with a thin layer of acrylic gesso. You want to make sure not to put the gesso on too thickly, because being able to see the grain of your muslin is crucial to having a miniature painting that looks like the full-sized version. If you want to have an especially texture-y canvas, try different types of fabric and see which one looks best.
Paint gesso on the edges & back as well.
That's it! These miniature canvases are so easy and fun to make that you can create hundreds of them in nearly no time, then invite some friends over to have a painting party.
Then you and your friends can have a miniature art show:
 Stella (lookcloselypress)


7 comments:
Cute! I've been buying these mini-canvases at art stores, but I have these materials already! Another project for the to-do list. Your completed paintings are adorable.
totally ADORABLE!
Wonderful post! thanks for sharing!
I agree that pretty much everything is better in miniature! Like Paperelle I have been eyeing those pre-made mini canvases but making my own could be even better! Although I would have to buy some gesso (oh darn, a trip to the art store!)
Your tiny paintings are little masterpieces! Thanks so much for teaching the rest of us how to start.
SWEEEET!!! And easy! thos never pass in my mind! Great tutorial, really thank you for sharing!
simply excellent ...........but what is acrylic gesso?is it acrylic paint?
Post a Comment