June 30, 2009

Born on the Fourth of July

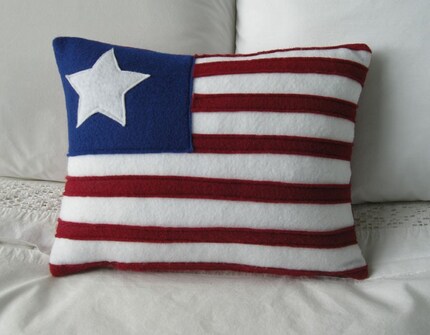
American Flag Recycled Felt Pillow by alexandraferguson.etsy.com

On July 4, 1776 the Second Continental Congress adopted the Declaration of Independence, bringing the United States of America into being.

Monogrammed Recycled Felt Pillow by alexandraferguson.etsy.com

Nathaniel Hawthorne, American author best known for The Scarlett Letter was born on this day in 1804.

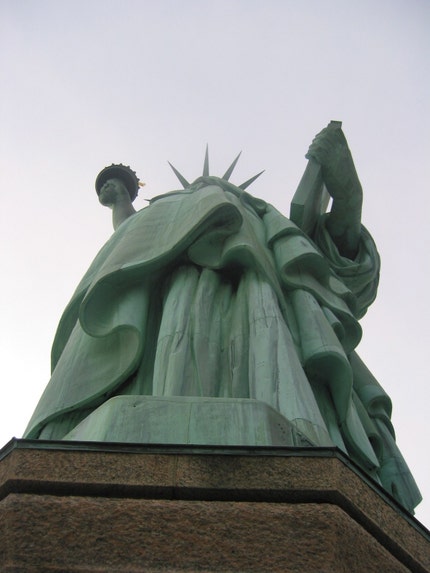
Liberty Rising from SpinachNPeace.etsy.com

On July 4th, 1886 the people of France offered the Statue of Liberty to the people of the United States of America.

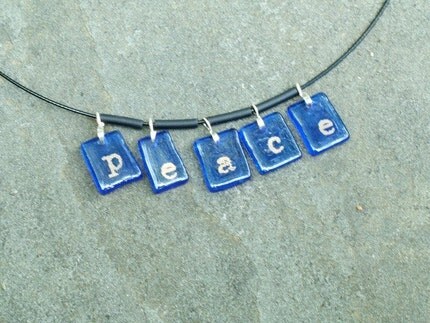
PEACE Recycled Glass Necklace by glassismyname.etsy.com

Ron Kovic, American peace activist and author of Born on the Fourth of July was, well, born on this day.

Happy Birthday!


- Susan
persuede.etsy.com

June 29, 2009

Salsa Recipe

Several years ago, we where invited to a barbecue and that's when I first tried homemade salsa on top of my steak. Since then, there is no barbecue without this great side dish for my family and friends, and even our kids love the veggies boost ;O)
Salsa is great all year round on not only steak, but also chicken or even meatloaf.

Ingredients:
  • half of white onion
  • 2 medium tomatoes
  • 1-2 jalapeno peppers
  • 1-2 lemons (depending on size and amount of juice)
  • cilantro
  • salt to taste

1. Chop all the veggies finely and place them in a mixing bowl.
Use 1 or 2 jalapeno peppers depending on how hot the peppers are, and on your personal preference. It's a good idea to use gloves while chopping the peppers; sometimes they are very hot, and the skin burn afterwards is not very pleasant.

2. Roll a lemon on a flat surface applying pressure to release the juice before cutting it in half and squeeze the juice into the bowl.

3. Add salt to taste. (I personally use quite a bit of salt.)

4. Mix the salsa and leave it for a bit to let the flavors mix.
If your salsa is too spicy for your taste, add finely chopped cucumbers, but allow the flavors to mix first as the salsa becomes milder after a while.

I also make a different version of this recipe without the tomatoes, which we use for steak tacos (great way to reuse leftover steak the next day after grilling). All you will need are some corn tortillas, which will be topped with reheated steak cut into pieces and salsa.

Enjoy!

by Mirela Jazdzewska from Jantar Handcrafted Jewelry


June 28, 2009

Summertime Crafting

So it's officially summertime in New York City. I love the beach, don't you? Sure I don't live near the beautiful blue water beaches of Puerto Rico or the white sandy beaches of the Bahamas, but I love the ocean nevertheless. The ocean is so restoring and inspiring to me. I remember as a kid I used to love going to the Jersey shore and just staring at the ocean waves. I still do that to this day. And then of course you can walk along the boardwalk and have a beer while the little one devours ice cream cone after ice cream cone.
I've been inspired to do so many crafty things lately! I was at my mother in law's house and saw these cute earrings someone made for her out of sea shells. So that got me thinking about all the fun things you can do with shells.
When you're at the beach it's a good idea to walk along the shore line and just collect little sea shells, rocks and bits of sand glass. It's fun and you can ask your little ones to help!
The first idea I had involved making some sand glass pendants. It's so easy!

These pendants are simply made with some beading wire that's wrapped around it and a loop is made for the chain. Cute, right? And super simple!

A good thing to invest in is a jewelry making drill. Fiskars makes a good one, as pictured below.

This drill is cool because you can use it to drill a hole into the sand glass if you want to. You can decoupage an image onto the glass and then drill a hole for a chain or even make earrings out of it.

Then there are the endless possibilities you will have with sea shells. OMG, seriously. You could probably write a book on all the things that are possible to make with sea shells.

My favorite thing to create is this beautiful wreath! How beautiful.
All you have to do is get yourself a foam wreath and come armed with a glue gun and lots of glue sticks. Then you can simply glue them onto your foam wreath, making sure that everything is covered in shells. Be sure to arrange them in a pretty manner of course, and you can overlap them too.
Awesome!

The Craftaholic
Sweet Buddha Designs

June 26, 2009

Where to Find the {NewNew} June 27 + 28

If you're like me, you're a bit weary of the rainy weather we've been getting. Thankfully, it looks like sunny weather will be heading our way this weekend, so go out, enjoy some sunshine, and check out the {NewNew} at your favorite markets while you're at it!

The Brooklyn Flea is back with more great vendors in Fort Greene on Saturday and the new outdoor location in DUMBO on Sunday. Fort Greene {NewNew} vendors include NordeaSoaperie, Joyella, BoxOfJoy, and AdornmentsNYC. DUMBO vendors are BetterThanJam, KissaThompson, and AdornmentsNYC.
Fort Greene Location: Bishop Loughlin Memorial High School, Lafayette Avenue between Clermont and Vanderbilt Avenues, Brooklyn. Saturday, 10am - 5pm.
NEW DUMBO Location: Water Street and New Dock Street, under the Brooklyn Bridge, Brooklyn. Sunday, 11am - 6pm.

The Brooklyn Indie Market is a Carroll Gardens staple, so if you haven't checked it out yet take a peek this weekend. {NewNew} artists WabisabiBrooklyn, BetterThanJam, and WindowsOfAgate will be present with their fun and whimsical wares.
Location: Red and white tent on Smith Street at Union, Carroll Gardens, Brooklyn. Saturday 11am - 7pm.

The Market in McCarren is a fun, funky outdoor market in the park where you can go to enjoy great food, music, and vendors. Of the {NewNew}, SaruStar and LittleBunny will be there to brighten your day with their fabulous handmade goods.
Location: North end of McCarren Park, adjacent to the McCarren Field, Brooklyn. Saturday, 10am - 6pm.

BAMRA Bleecker Street Festival
Bleecker Street is always a fun street to get lost on, and this Saturday it will be even more interesting with the BAMRA Bleecker Street Festival going on. More than 150 vendors are participating in this one-day event, including {NewNew} members LuCrafts, aStudioByTheSea, and JDavisStudio.
Location: Bleecker Street between Broadway and 6th Avenue, Manhattan. Saturday, 11am - 6pm.

Curves in the City
Full Figure Fashion Week in New York is sponsoring a discount retail shopping event for plus sizes only. Regular admission to the event is $15; VIP admission is $25 and gets you a goodie bag. While you're there, be sure to check out {NewNew} vendor CollectiveElements.
Location: Ripley Grier Studios, 520 8th Avenue (bet. 36th and 37th Streets), 16th Floor, Room 17D, New York, NY (must have I.D. to enter building). Saturday, 11am-3pm.

The Can Factory Market at the Old American Can Factory

The Can Factory Market at the Old American Can Factory is a new place to find wares designed, crafted, grown or published from a broad community of creative makers. Located in the restored 5000 square foot garage of The Old American Can Factory, a historic industrial complex that is a curated haven to more than 200 artisans, artists, designers, publishers and non-profit organizations. Go check out {NewNew} members Wabisabi Brooklyn and Cakehouse.
Location: 232 3rd Street at 3rd Avenue, Gowanus, brooklyn. Sunday 11am-7pm


Karina
Windows
OfAgate

June 24, 2009

If I Had A Bell...

Remember this old song? It was a staple during my summer sleep-away-camp days:

"If I had a bell, I'd ring it in the morning, I'd ring it in the evening, All over this land..."

It reminds me of all the creative ways we handcraft-folk strive to let the world at large know what we're doing. Of course, we try to ring bells with our Etsy shops and our blogs, with the hope that the attention will lead to sales. But I think it's also fair to say that it's difficult to create in a vacuum.

Judging by a recent blog roundup from my fellow {NewNew} artisans, talking about how we do what we do, as well as what and who inspires us to keep creating is an important part of the process. The ongoing inspiration and the sense of satisfaction we get from knowing someone likes something we made -- uses it, wears it, cherishes it -- is, well, kinda awesome.


prismPOP @ My Coney clearly has a soft spot for Coney Island USA, but also blogs about her experience at the recent Renegade Craft Fair with her fellow {NewNew}ers and (ouch!) sunburnt knees.


pandawithcookie @ pandawithcookie.blogspot.com offers an inside look at preparations for her first craft show, Seventh Heaven, in Brooklyn.


fubabee @ Pretty Stationery for Beautiful Souls talks about what inspires her beautiful stationery, but also tackles the whole "wedding industrial complex" as part of an ongoing meditation on the value of handmade.


pulpsushi @ pulpsushi.typepad.com writes with verve (and lots of exclamation points!) about what inspires her in work and life.


dirtylovesclean @ DirtyLovesClean.blogspot.com invites readers to follow her soap-making adventures, which include the pros and cons of craft fairs, veggie "meat", and the creation of a boxed wine soap.


jantar @ Jantar Handcrafted Jewlery uses her blog like an inspiration board, full of pictures and stories behind the creation of her lovely jewelry, as well as detailed, easy-to-follow how-to's.


You'll find all of these blogs, and more, through the {NewNew} member shop links and banners on the left. Take a moment to follow the links and learn a little bit about what inspires some of your favorite artisans. Perhaps you'll be inspired too.


Susan
persuede.etsy.com

June 23, 2009

Make a light box for photography


A few years ago, someone who was helping me with my website told me that my pictures were not really that great. The truth stung a bit, my feelings were hurt, but I knew I had to take better photos.

I decided to make a lightbox to use for taking pictures. Now, it seems that everyone needs to take decent pictures these days. Whether posting to a blog, managing an online shop, or just uploading pics to flickr... a great picture can make all of the difference.

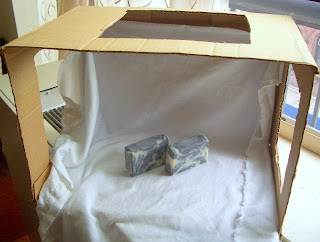
I made a simple lightbox using the box which some recently ordered supplies had arrived in. It was pretty straight-forward. Not too fancy, but my pictures are so much better for it.

Simply cut out holes in the sides & top of the box, cover with tissue paper (or not) and lay a drop-cloth inside the box. I usually place the box inside a sunny window or you can place lamps outside of the box. Place the object you are photographing inside and snap away!

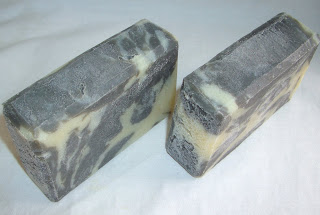
My light box is very rustic and obviously handmade, but once you take the photo, crop it a bit, and - tada! - a decent looking picture. You can use any size box depending on the size of the object you are shooting.

I’m not going to say that I have the best pictures in the world, but they are 10x better because of my light box!

Here is a site with more detailed instructions: Make your own light box

-Nordea
Nordea's Soaperie

Just a Seamstress? The Museum at FIT Showcases Isabel Toledo's Fashions


If you are in need of cultural inspiration but are short on time, the oft forgotten Museum at FIT has the perfect dose. The current exhibit “Isabel Toledo: Fashion from the Inside Out,” showcases work by the Cuban-born fashion designer Isabel Toledo who is described as "a designer's designer." Isabel is admired for her experimental techniques and unique vision of wearable American sportswear: A section of the exhibit entitled "Origami," a current runway trend, shows sculptural elements of her garments while another grouping described as “Liquid Architecture” displays jersey dresses.


Many may be familiar with the wonderful Nordstrom store advertisements in fashion magazines, all drawn and executed by Isabel’s husband Ruben Toledo. This exhibit is wallpapered with his fashion sketches. Isabel describes her role in her close collaboration with Ruben as that of just a “seamstress” and Ruben as the “artist/illustrator.” An example of their process, she explained, is that sometimes she articulates a design vision of which he renders a sketch. The sketch above is a portrait of Isabel by Ruben.

As Isabel stated to the museum's director, Dr. Valerie Steele:

I really love the technique of sewing more than anything else…the seamstress is the one who knows fashion from the inside! That's the art form really, not fashion design, but the technique of how it's done.
I find it refreshing for a designer to discuss the technical art of sewing. As portrayed in Bravo TV’s The Fashion Show, too many design contestants whine that sewing is so hard and that they see themselves as visionaries not seamstresses. Their scariest assignment was to dress real women!!! Kudos to Isabel who insists that she does not "want to be radical," and finds that "weird is not smart," and yet creates stunning, innovatively constructed garments.

This small museum’s exhibits are always free and this show is on now through September 26, 2009. Click here for more details.
- Talita for Fairywallah

June 22, 2009

Merpeople live underwater


The Mermaid Parade kicks off summer swimming season in Coney Island every year since 1983. Saturday was rainy (not surprising given the recent weather conditions) and local fair, Flea by the Sea, sent an e-mail announcing that it would be closed due to forecasted thunderstorms. Despite seemingly negative factors - the country's largest art parade went on as scheduled!

Dick Zigun, the unofficial mayor of Coney Island, founded both the Coney Island Circus Sideshow and Mermaid Parade in the early 80's. He dreamed of celebrating the artistry and heritage of Coney Island in similar fashion to the Village's Halloween Parade crossed with the Mardi Gras of Coney Island's past (1903-1954).

Every year, people and animals of all kinds come out to the beaches of Brooklyn to join in the masquerading. Most costumes pay homage to sea life: jellyfish, sharks, titans + pirates were all in attendance this year.


Many folks also enjoy celebrating the freaks of circus culture - Zoltar (from the movie Big) was seen headed down Surf Avenue granting wishes.


Mermaid parade is well known for scandalous costumes including partial nudity and lots of pasties - apparently it is legal in New York State for women to be topless in public as long as it is not part of a business venture. Interesting.

These three women were fully covered in body paint - not sure how they relate to mermaids but certainly fit right in with the Coney Island spirit.


The parade route ran along Surf Ave showcasing floats and antique cars - as well as several political activists, voicing their opinions on the current state of Coney Island.


Years past have threatened they would be the last of the Mermaid Parades, but fortunately the show continues to go on! Beads were tossed from floats, the Ringling Bros. handed out plastic noses + dancing was infectious.

All in all, it was a wonderful showcase of the creativity and fun New York City and Coney Island specifically, have to offer. The day started off to a very wet start - but rains calmed to a slight drizzle for the majority of the parade. Either way, the merpeople were happy - they do live underwater after all!


- lisa

June 20, 2009

Daughter's Dancing by Father's Design

My father Luis Fernando Quintero moved to New York City more than 30 years ago. After a series of uninspiring jobs in Long Island City's factories, he decided to seek a job in the jewelry industry. He knew a thing or two about polishing from past jobs in his native city of Medellín, Colombia and recognized that he was a man of artistic abilities. After going door to door from jewelry company to jewelry company, his persistence paid off and he landed a job with the company Parisian Creations. His time at Parisian Creations would be long, but educational. When someone would leave, he would quickly learn to do their job until he had learned it all. There were other jobs in between, but in 2005, he used this expertise to design his own jewelry lines for his new independent business, Fernando Jewelry.


I had always admired my father's talent and secretly wished that I could work with him. It wasn't until this fall, when I decided to change careers and enrolled at the SUNY Purchase Conservatory of Dance, that I would get my wish. Having quit my job to return to school, I faced the challenge of finding a job I could do while dancing. Given my demanding rehearsal schedule, I knew it had to be a job that would rely heavily on the internet. Short of a website, I noticed that my father's jewelry designs had virtually no online presence. I immediately had a vision for a father-daughter partnership. My father, with a talent for manipulating precious metals into any shape and pattern imaginable, would design all the jewelry and manufacture it by hand. I, with a talent for movement, would focus on moving his fine jewelry designs from where they live - his Manhattan workshop - into the online shops of the world. And so Fernando Jewelry's e-operations, a collaboration between a father and a daughter, began.


I never would have expected that the internet could bring my father and I closer together. While launching Fernando Jewelry's e-operations, I learned a lot about my how my father creates his jewelry masterpieces. He is a perfectionist and has been nicknamed by former co-workers the "jewelry doctor," for his amazing skill with restoring damaged jewelry. He is also someone who goes to great lengths to conserve. While collaborating with Meghan Myers at WedVert to develop a line of organic wedding bands, I learned that my father already habitually recycled and reused metal scraps and older jewelry to create his designs. Since then, he has agreed to make it a priority to incorporate these personal values and work practices into all of his designs.

So for this Father's Day, my father and I want you to join us in celebrating the internet - blogs, Etsy, Google groups and all - for the opportunity it gives jewelry artists to share their art with the world, while enabling a new dance artist in the process. Happy Father's Day!

by Karla Quintero
luisfernando.etsy.com

June 19, 2009

Where to Find the {NewNew} June 20 + 21

If you've been procrastinating on getting a Father's Day gift, don't fret because the {NewNew} will be all over Brooklyn this weekend to help you find the perfect present.

If you haven't been to the Brooklyn Indie Market yet, be sure to make a stop there this weekend. With the fantastic vendors there this Saturday, you're sure to find a great Father's Day present. {NewNew} artists LuCrafts, NewYorkClocks, and WabisabiBrooklyn will be around to help you search for the perfect gift.
Location: Smith Street at Union, Carroll Gardens, Saturday 11am - 7pm.

The Brooklyn Flea returns to Fort Greene this Saturday. Check out this fun market full of tasty food, delicious desserts, and fabulous vendors. {NewNew} members include MayLuk, Cakehouse, Karen's Monsters, AdornmentsNYC, Persuede and Jantar.
Location: Bishop Loughlin Memorial High School, Lafayette Avenue between Clermont and Vanderbilt Avenues. Saturday, 10am - 5pm.

Seventh Heaven
This one-day outdoor fair in Park Slope has always drawn huge crowds, so be sure to join the fun and say hello to {NewNew} vendors KimmChi, WabisabiBrooklyn, LuCrafts, Journalistic Tendencies, Jantar, Yania Creations, Collective Elements, a Studio by the Sea, and Milkmade.
Location: Seventh Avenue from Flatbush to 16th Street. Sunday, 11am - 6pm.

Happy Father's Day weekend!


Karina
Windows
OfAgate

June 18, 2009

When in India: Mendhi!

In 2003, I set off on a 4 month independent backpacking tour of India. My goals for this trip were to explore, learn, see, eat and experience.

One fateful day in Mumbai, I met who I would call my “Indian Mother”, aka Hira.

Hira is a business manager and I met her when I went to get a notary for some paper work I had to send back to the US. To make a long story short, we got to talking and she invited me to a traditional Indian wedding. Who was I to decline?

The night before the wedding, Hira invited me to stay at her home and have the ceremonial art form known as Mendhi done at her place. Traditionally, Mendhi is painted on to hands and feet using Henna, a dye in the form of paste made from a plant found in India and other sub-tropical areas. Mendhi is not exclusive to India however, and is done in other parts of the world such as other parts of Asia and Africa.

The Elaborate designs were painted on my hands, both my palms and the back of my hand. It took about 3 hours to complete the designs and then I had to sleep with plastic “mittens” on my hands! Not comfortable at all! Upon waking, I would scrape off the dried Henna to reveal the beautiful designs. Below are some pics of the before and after of my Mendhi.

The wedding was a great experience and I fit right in with my Mendhi!


by Lorina Pellach-Ladrillono of The Original Beadscarf and beadscarf.etsy.com

June 17, 2009

Crafts and Craft Selling for Kids


Crafts & Craft Selling for Kids

If you are a crafter parent it won’t be long before one of your children asks, “Can I make things to sell too?” Then your quandary is, what can a child make that actually looks good enough to go in your shop or display? Fine craftsmanship is not exactly something your average ten year old is capable of. My daughter tried making pins in felt, which were adorable but were too much work for the price point they would sell at. She tried crochet, but couldn’t master anything beyond a chain. Finally what worked was “Jessamyn’s Button Hairbands,” which consisted of large cloth covered buttons (re-using fabrics from thrift shops) with elastics tied to the shanks on the back. Moreover, making them was a process she could do virtually by herself. I bought the supplies, designed her card, and she pays me back 50 cents for every button she sells. And she does very well--selling them at fairs at a low price point, yet earning enough to be the envy of all her friends.


Here is another idea for kids wanting to earn their keep, or like mine, to sustain their addiction to Pokemon cards.

Recycled Bag Tags & Bookmarks

Supplies & Tools:
Old Magazines
Scissors
Glue Stick
Paper Cutter
Mylar or Acetate sheets or any kind of flat, clear plastic
Colored paper (if for business it should be non-fading)
Laminating Sheets
Hole Punch
Plastic Lanyard or other string or yarn


Let the kids go through the old magazines cutting out all the headlines that are over 3/8” tall. Remember the letters must fit comfortably on a 1.25” strip of paper. If this will be for a “business” they can cut out all the letters individually and put them in marked envelopes for each letter, number, and one for symbols. Some of these headlines were funny enough to use all by themselves, come to think of it.


Using the paper cutter, cut 1.25” wide strips of colored paper (I had old scrapbooking paper the kids had been cutting up inefficiently for the last 6 years) or magazine pages with great color or texture for the background. If you don’t have a paper cutter you can use a scissor but the rolling cutter is more efficient and far safer than things like x-acto blades.


Now they can choose the letters they will use. Names are good, as are cool phrases and sports. Run the glue stick along the length of the strip of colored paper. Arrange the letters and press into the glue. Leave room on one end for a hole if a lanyard will be attached.


Cut a larger strip of acetate and glue the back of the colored paper onto it, so the tag will have some firmness. (We actually used the heavy plastic from a box of Pokemon cards for the strips, so we felt very virtuous and green.) Cut a strip of laminating paper and use it to carefully seal the front of the tag to the acetate, leaving at least 3/16” extra space all around the colored paper. This is undoubtedly the trickiest part of the whole process and your kids will need some practice to master it. You need to fold back just a corner of the laminating paper and then position it atop the tag. Then you slowly peel off the backing while smoothing it down at the same time, starting from that first corner. With the paper cutter trim the sealed edges. Punch a hole (you will need a good quality hole puncher, like McGill or Fiskars, available at craft stores) in the tag and add a lanyard or string.


The fun, hip, professional looking results can be used as a bag tag, a book mark, a backpack decoration, a necklace, a party favor, a seating tag, and I've even been thinking, earrings, if you want to work really, really small. The process can be used for children’s parties, school fair fundraisers, for starting your child’s own Etsy Shop, and of course, a few hasty Father’s Day gifts.


Jody Lee