
 This holiday season, I decided to give myself the gift of handmade and bring my beloved Spanish necklace back to life. I was surprised to learn that rethreading a broken-down chunky necklace is simple, inexpensive and actually a lot of fun.
To do so, you'll need the following supplies:
1. thick silk thread
2. a pair of scissors
3. tweezers
4. a small piece of thin wire, of similar thickness to the thread
5. necklace closures
6. the original necklace pieces, or in this case rocks, that comprised the necklace.
 Step 1: You start by measuring a piece of thread that is five times the length of the necklace. Once you have measured out this piece and cut it, take it and fold it in half and then, fold it in half once again.
Step 2: Pass the piece of silver wire through the folded end of the thread, fold it in half over the thread and then twist it so that it doesn't slide around, but rather clasps this end of the thread. Make sure that once folded the wire is longer than the length of your longest necklace piece. This will ensure that if anything gets stuck, you can use the tweezers to pull on the wire and ultimately pull the thread through.
Step 3: Take the other end of the thread and double knot it to the first half of the necklace closure. You are now ready to start rethreading the original necklace pieces.
 Step 4: Insert the wire through the necklace piece and pull the thread through. Pull the thread through until the necklace piece reaches the knot on the other end of the thread. Pushing the necklace piece down against this knot, create a knot on the other side of the piece as close to it as possible. If the knot is too small such that it slides through the necklace piece, make it a double knot. The closer this knot is to the necklace piece, the better the necklace will look in the end.
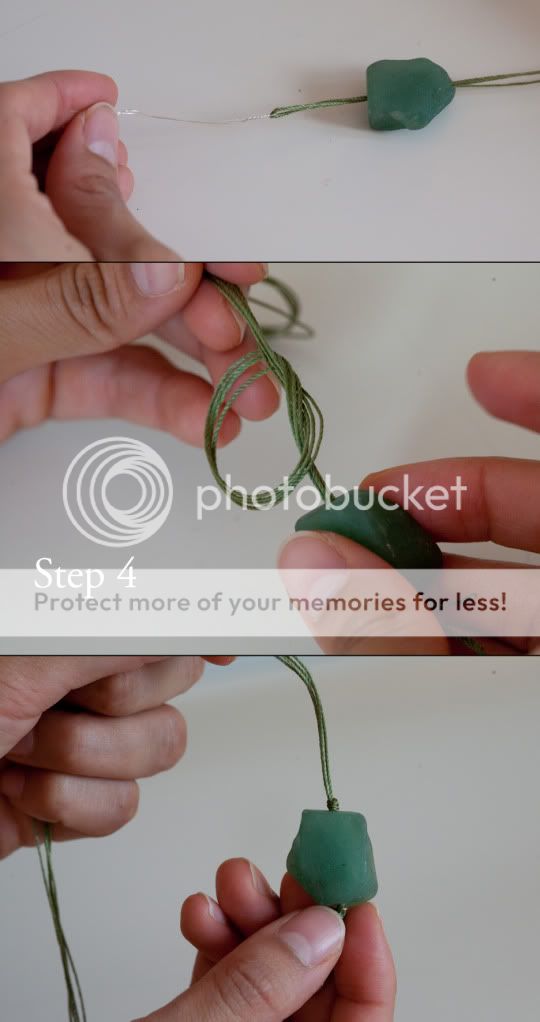 Step 5: Repeat step four until you run out of necklace pieces. Once you have created the last knot or double knot to keep the last necklace piece in place, tie a double knot around the second part of the necklace closure.
Step 6: Wear your refurbished necklace and enjoy the fruits of your own handmade labor. Happy Holidays!

This how-to was brought to you by Fernando Jewelry, a NYC-based independent jewelry company specializing in handcrafted sustainable jewelry and jewelry repair.
Photos by Florian Hoenig
Fernando Jewelry
LuisFernando.etsy.com
2 comments:
Nice little tutorial! Love the big chunky stones. They such a gorgeous piece of jewelry!
That's a great tutorial, Karla! And the necklace looks gorgeous.
Post a Comment