 which will soon adorn this bag:
 And here is the process:
Materials

- Reverse image of the picture you want to use
- Tracing paper (You can use ordinary paper, but tracing paper makes it easier to see the image you're tracing.)
- Sulky Iron-On Transfer Pen
- Fabric
- Iron
Process
- Trace your image on tracing paper. It will iron on IN REVERSE. You can use the mirror image setting of your printer to print a reverse image to trace. Once transferred, the image will be correct again.

- Lay the tracing paper on the fabric with the ink side touching the fabric. Use a dry iron (no steam) on a cotton setting and iron the back of the tracing paper.

- Lift up a corner of the paper to check whether the ink transferred.

- Start embroidering.
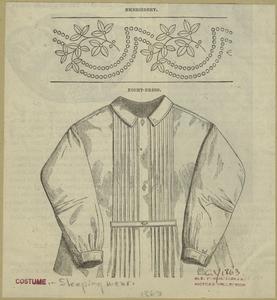
You can use this process to create your own embroidery transfers from photographs, drawings, or kid art, and to refresh vintage iron-on transfers where the ink has dried up. Or create your own designs from antique magazines like this embroidery pattern dated 1863 from Godey's Lady's Book, which you can find at the New York Public Library Digital Gallery.
groundsel.etsy.com


what an amazing idea. I love this. bookmarking it and your blog, too!
ReplyDeletethis is terrific! definitely inspired to give it a shot. thank you!
ReplyDeleteThat is excellent tutorial. Thanks for posting. Your project is very interesting as well.
ReplyDeletenot to mention, the nypl gallery looks like an excellent resource.
ReplyDeleteThis is awesome and I look forward to trying it out soon.
ReplyDeleteLove it. The other day, my son just found an image he wanted on a t-shirt. I said I'd have to go online to find out how to do it, and then voila, look what I see just a few days later. Thanks.
ReplyDeletelovely!!
ReplyDeleteThis is such a great idea! It looks fantastic!
ReplyDeleteGreat tutorial--very inspiring!!
ReplyDeleteThat's an excellent tutorial! Thank you!
ReplyDeletesuper smart. can't wait to try it out myself. and has so many different potential applications. great tutorial!
ReplyDeleteCool!
ReplyDeleteWow, this is so easy. I want to embroider everything!!
ReplyDeletewow==love it--talented you are!!
ReplyDeleteI love the house, what a great idea! Thanks so much for sharing this, I'll be linking.
ReplyDeleteMahvellous post, thanks! For some reason making my own transfers intimidates me...
ReplyDeleteYou are amazing. Thanks for sharing
ReplyDelete