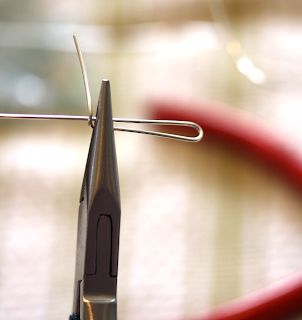
The round-nose pliers come in first. Felicity begins by bending the wire around them into a "U" shape.

Using round-nose pliers to form a "U"
She then uses her flat-nose pliers to firmly grasp the end of the U together with the straight portion of the wire as she wraps the U end around the straight portion of the wire. The picture below shows the first wrap-around.

Firmly grasping doubled-up wire with flat-nose pliers
After wrapping the wire several times, Felicity uses wire-cutters to snip off the remaining "tail" of the wire, thus completing the loop.

Snipping off the tail with wire-cutters
Lastly, Felicity uses her round-nose pliers to carefully shape a hook out of the now-closed oval-shaped loop that she used the same pliers to make in Step 1 of the process. Full circle! Neat!
Clearly, there's much more loop-making and wire-wrapping involved in creating Felicity's gorgeous bracelets, and all three of the tools mentioned here play their various roles in the process. But if there's one tool Felicity uses especially much, it's her flat nose pliers. Specifically, she uses them to to push down and squeeze in the loose ends of the wrapped wire more closely to the straight pieces, both to keep them securely wrapped and to ensure that there are no sharp ends of sticking out.

Pushing-in wire ends with flat-nose pliers
This kind of care and attention to detail, in addition to an obvious sense of style and the skillful use of the tools of her trade all come together in Felicity's distinctive work. For more examples, check out her Etsy shop. Thanks for showing us a bit of how you do it, Felicity!

Until next time --


1 comment:
Love Felicity's designs. Thanks for the tutorial!
Post a Comment