
Every year, my friend Catalina Bertani posts photos on her Facebook page of the beautiful pysanky she makes in the weeks leading up to Easter. (One such example shown above.) Even if you’ve never heard of pysanky, chances are you’ve seen one of these glorious eggs at some point. Pysanka (pysanky is the plural form), refers to the traditional Ukrainian designed easter egg, which is achieved through a wax resist and dye method. Although Catalina grew up in Iowa and is originally from Columbia, making pysanky has become a tradition in her own Brooklyn family. This year she invited her friends to come over and learn the basics of this ancient (yes, ancient; the tradition dates back to pre-Christianity) art form.
Catalina’s table was all set up for decorating when my eight-year old son Jake and I arrived. Tables were covered, dye baths were ready, and all the tools we needed were available. In addition to regular white chicken eggs, she also gave us each a much larger goose egg, which you can order online. She also had a few ostrich eggs to show us, but as first timers, we weren’t ready for those!

Here are the basic steps we took to create our very first works of pysanky art:
First the eggs need to be washed with mild soap and water, and rinsed in a bath of vinegar. This is to remove any traces of resist that might be on the egg and ensure that both the wax and dyes take nicely to the egg’s surface. Next, the eggs must be relieved of their yolks, and though I’ve blown yolks from eggs with my mouth before, here we used a hand pumped egg blower, which also doubled as an awl to punch the holes in each end of the egg prior to pumping out the yolk.

Above, Jake squeezing out the yolk. Much more pleasant that blowing by hand (or, by mouth, actually).
Then the holes needed to be sealed with wax, to prevent the egg from filling up with liquid while in the dye baths. We used a tool called a kistka for this, which is the “drawing” tool used for making designs on pysanky eggs. A kistka (shown below) has a tiny pot at the end of a rod that holds a small chunk of beeswax. The pot is then held above a flame until it’s melted, then comes out of a tip below the pot when applied onto the egg (sort of like a fountain pen).
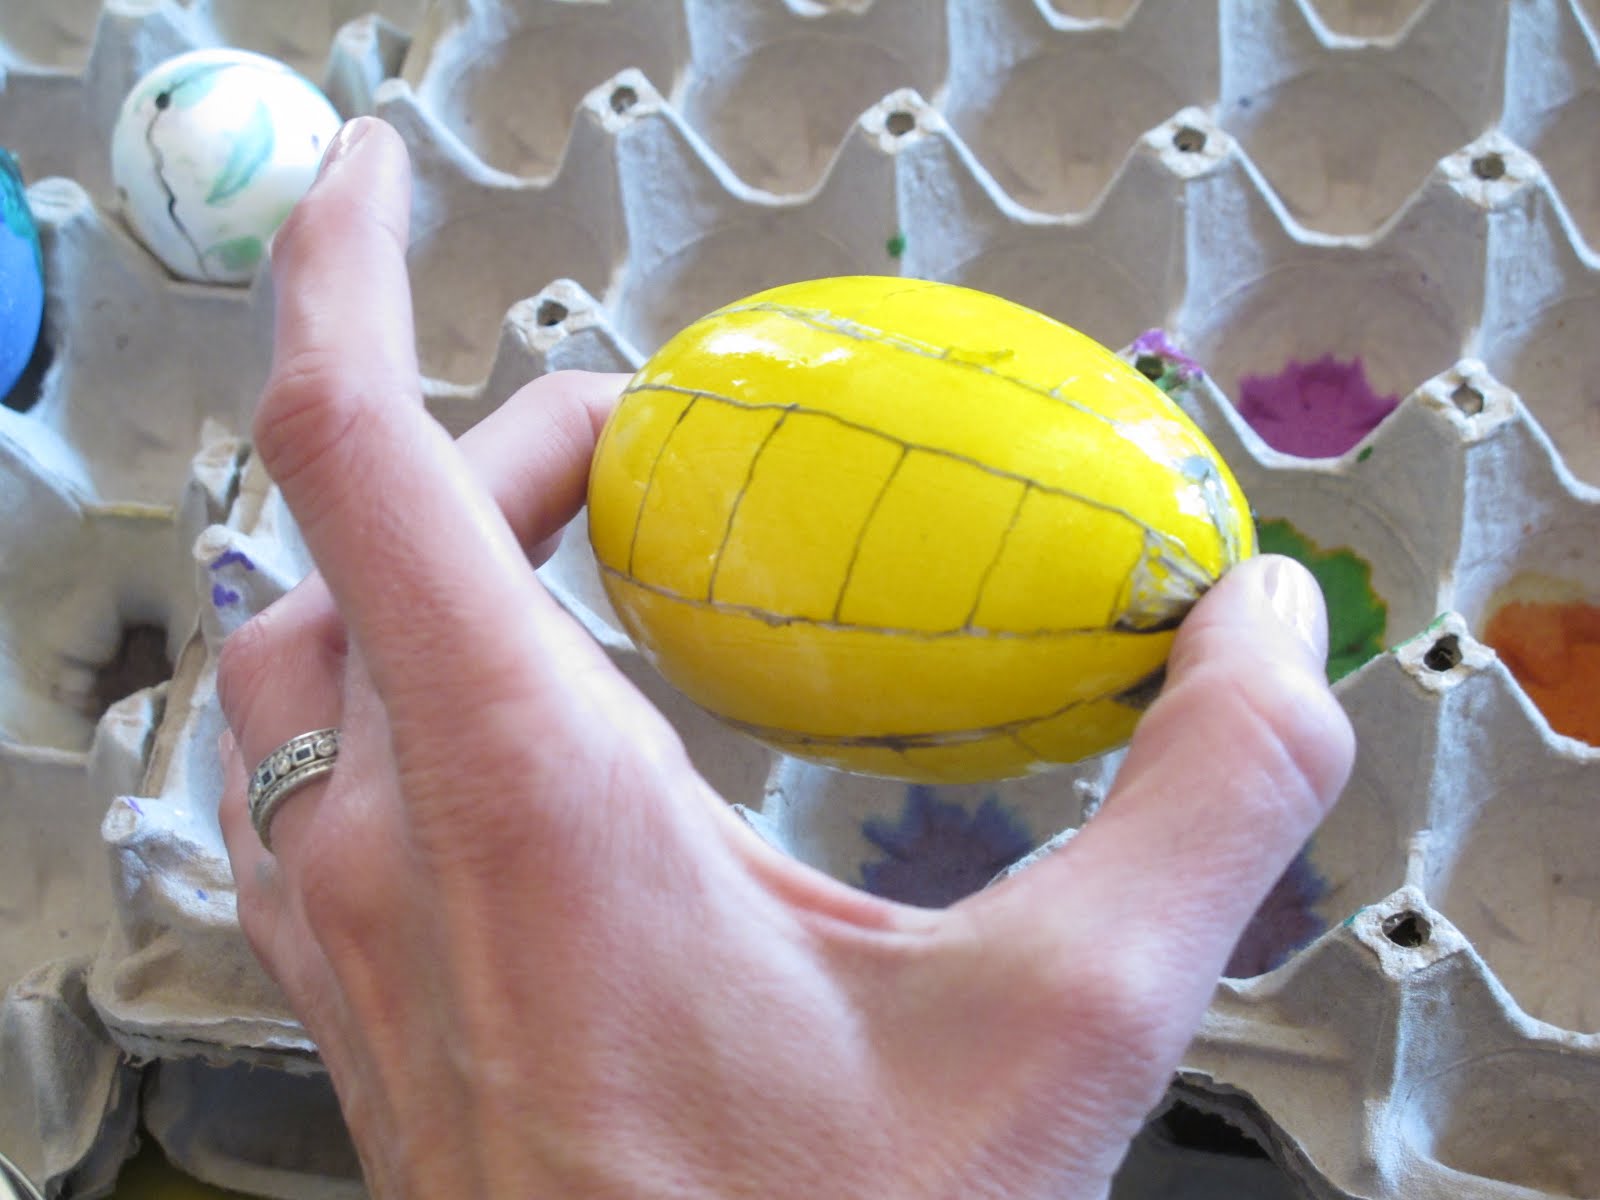
Next we drew a design onto the egg in wax using the kistka; wherever there was wax the egg would remain white. The egg then went into its first dye bath. The rule for pysanky (and any multiple step dye process) is to begin with lighter colors then do darker ones. I started with yellow.
Next I added further designs in wax. Wherever I drew now is where the egg would remain yellow after the next dye. I put the egg in a bright fuchsia for the second color, and a third round of wax drawing preserved that dye.
Finally I put the egg into a lovely blue bath. Traditional pysanky eggs use five or fewer colors. I stopped after three mainly because the process thus far had taken me well over an hour!
Below is my egg coming out of its blue dye bath. Though I thought I could tell what it was going to look like, the proper “reveal” didn’t occur until the final step, in which the egg goes into a toaster oven (or any oven) on a heat setting only high enough to melt the wax off of the egg.
And, ta da! I was so happy with the results of this project. My son was too-he intuitively knew to keep his design scheme simple, and wound up with a very dramatic egg using only red and black dyes, with his name marked in white.
Jake's egg looked amazing too!
Here is the egg Catalina spent the afternoon working on. She is clearly a seasoned hand. For the record, none of the eggs we made here can technically be called pysanky, since the term refers to the design motifs rather than the wax resist method of applying the design. But many of the traditional motifs are very simple geometric designs, and can be replicated fairly easily.
There are loads of online resources for supplies and information on how to make pysanky. And right now, through May 27th, the Ukrainian Museum on the lower east side (222 E. 6th Street between 2nd and 3rd Avenues in Manhattan) has nearly 300 pysanky eggs on display, boasting an incredible range of color, design and craftsmanship. They’ll also be offering workshops on how to make pysanky. (Call 212-228-0220 for information.) Be sure to check it out, and tell them that the {NewNew} sent you!
Posted by Leslie Astor
astorknot.etsy.com
ispybabybunting.etsy.com


5 comments:
Great job Leslie! When I began doing pysanky I just ordered a kit through a catalog and gave it a whirl so it was interesting to read a detailed take with photos and some background. I learned new things from reading this post so thanks! I would add that if you decide to give it a try and it sticks as a tradition in your home be sure to initial your eggs and write the year somewhere. believe it or not you forget over time and it serves to bring back memories. We keep a few every year, break a few every year and give the rest away as gifts which become treasured keepsakes by grandparents, teachers, and friends. It has gradually become a fun rite of spring for us to work on our eggs. It is so gratifying to se how much you enjoyed learning about pysanky with us. I love the way you weave art into daily life and share that vision with the rest of us.
Wow! I want to try this!
These eggs are so beautiful. Thanks for sharing
These eggs are so beautiful. Thanks for sharing
@tanrara, You're right! I was also told to put my initials and the year on my egg first thing. Unfortunately I forgot to do that, but I'll be sure to remember next time. And believe me, there will definitely be a next time!
Post a Comment