In New York City most apartments are on the small side. We live in shoe boxes. Most of us all live on tight budgets. And most of us are single and like to go out. Sometimes though it is nice to entertain, even in our little shoe box. I used to live in a 300 square foot apartment. My husband to this day makes fun of it. It was my bed, my work table, and 3 cats. Plus a few bookcases here and there. It was cozy. It was in Hells Kitchen which is a very fun place to hang out in and filled with history. Even though I lived in a small studio I still liked to have friends over. I didn't have chairs or a dining table but we could have drinks and appetizers. Entertaining is nice, pleasant, cozy and personal.
The next few weeks I will be posting a series of DIY called Setting the Table. You don't need to be an expert sewist to do these projects but it will help if you know the machine.
There will be projects for every living situation. We will start with simple and easy, a napkin.
 |
| double sided napkin using Liberty Wiltshire backed with muslin |
Table cloth Embroidered placemats Quilted table runner  | ||||
| table runner and coasters |
Each above item can be used in any table setting, big or small, casual or formal. What will determine the feel is what fabric you use.
The first project, the double sided napkin, can be used for every day meals or only when special meals with guests are held.
Materials:
For 4 Reversible Napkins
1 yard of 44" wide fabric - quilting cotton, broadcloth, or light to medium weight cotton woven fabric
1 yard of 44" wide 200 count muslin I use the higher count muslin because it is much softer than regular dress maker's muslin
matching cotton or poly machine thread. I prefer Gutterman brand but Coats and Clark is also good.
Size 10 machine needle
All fabric should be pre-washed.
1. You can layer both pieces of fabric on top of each other for cutting. Cut out 4 18" squares.
 |
| I use a rotary knife to make sure I cut a completely even square |
2. Lay one piece of muslin and one piece of your print face to face. Muslin has no face so just choose one side. Pin it together. Sew 3/8" seam allowance on all sides leaving a 4" opening. When you are sewing the sides continue with one seam, you will pivot when you get to each corner. Start your sewing in the middle of one of the seam allowances, so don't start at a corner. Press with a steam iron.
 |
| The face is the nice side. |
 |
| Pivot at the corners |
 |
| 4" opening so you can turn the napkin back to the right side |
 |
| Clip corners before turning out |
4. Clip corners before turning back to the right side. This reduces bulk and will help you get nice pointy corners. Use a point turner for this. I like the bamboo kind.
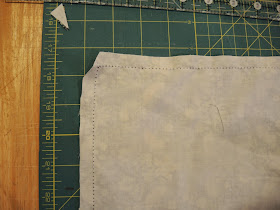
5. After turning out, press with a steamy iron. And sew around all 4 sides using a 1/4" seam allowance. And press again.
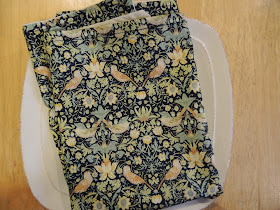
Beautiful and soft spring napkins!
The next post will be making a tea towel with hanging utility loop.
Thanks,
Tracey
https://www.etsy.com/shop/traceytoole


No comments:
Post a Comment