Instructions
What you need:
- A plain shade. The big box stores will cut it to size for you.
- Acrylic paint. I used leftover paint from my kitchen "remodel" and a paint sample
- Stencils (Thank you Martha)
- Spray mount
- Sponges to sponge on the paint and something to pour the paint into
The Process
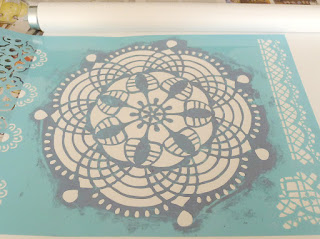
Roll out the shade and place it on your work surface. Because I'm lazy I only stencil the shade to fit the actual window opening. I leave the part that no one will ever, ever see blank.
Lightly spray adhesive on the back of the stencil. (Do this in a place that's easy to clean up. There may be spray over and you don't want to get that on your shade.) Place the stencil on the shade flattening out the stencil.
Pour a little of the paint in a dish and dip your sponge in. At first use paint sparingly until you get a feel for how much you will need to cover the stencil. Starting from the middle of the stencil begin sponging on the paint.
Once you've covered the stencil with paint, carefully pull off the stencil and place it on a different part of the shade. You don't have to re-apply the spray mount. The back of the stencil should maintain its tackiness through the whole project.
Continue in this manner until you're satisfied with your project. I was using two colors and two stencils. First I stenciled all the large blue shapes, then I washed off the large stencil, re-applied some spray mount, and continued with the red paint. I used the same process to fill in the spaces between the large shapes using the smaller stencil.
One more window to go. . .
Simone
groundsel.etsy.com


2 comments:
Wow! Those are great, Simone!
those turned out awesome!! great idea!
Post a Comment