
Here's a quick and easy project using scraps of felt that you can do just about anywhere. I started the one I'm about to document while selling my wares at the Hell's Kitchen Flea Market this past weekend, for instance.
Now, before I start I just want to say that there are some really nicely-made finger puppets out there (check out this post by NewNew blogger, Karina, for a great tutorial), and these ones I made aren't them. No. Mine are, shall we say, a bit rough around the edges? But they're fun and easy and that's at least half the point.
Materials
All you need is felt pieces long and wide enough to cover your (or someone else's, say, a child's) finger, plus some smaller bits for details; embroidery floss or thread; a needle or two large enough to accommodate said embroidery floss or thread; pins to hold things together while you sew, and perhaps a bit of fabric glue and fabric paint if you don't want to sew every little detail.

The piece of felt I started with.
Steps
First, Find yourself a piece of felt as described above and wrap it around your finger. Pin the ends together where they overlap, making a tube.

Next, sew up the open side and top of your tube.
 Snip off the pointy edges if you like, and begin adding details. I started with a pair of eyes and a pair of pants. I sewed the pants to the bottom of the tube and let the legs extend beyond it. For fun I used a contrasting color of embroidery floss and continued stitching beyond the point where they attached to the felt.
First details: Eyes and pants.
 Back at home from the market, I added a hat. I did the same as with the pants and stitched all the way around the perimeter of the hat with a contrasting color of embroidery floss.
 Then I stitched my little hat-and-pants-wearing guy a mouth and glued him on a nose.
 I finished with a couple of dabs of fabric paint for eyeballs. And my first-ever, rough but cute in an ugly sort of way finger puppet was complete!
But, all the while I was making my first-ever finger puppet I was wondering if I was doing it the best way, starting with an already sewn-up tube instead of a flat piece of felt. So, being constitutionally unable to leave well-enough a lone, I made a second-ever finger puppet in this alternative way. Feeling less restricted in terms of sewing on the details, I got a bit ambitious and gave this second finger puppet arms.
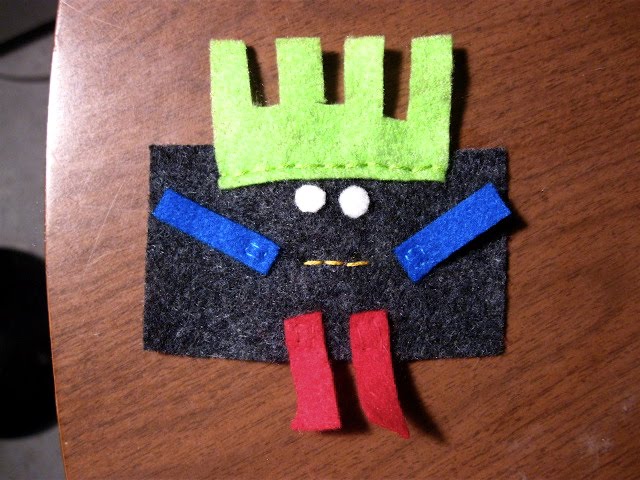
Second puppet, different method, different details.
Although the sewing-on of details was certainly easier, it was harder to tell where to put them. I used the eyes to as a point of reference, remembering that the area I had to work with was small. Even so, the arms ended up way on the sides of the tube, pretty much out of view.

Where'd the arms go?
It was easy enough to reposition them, but only by so much. And I got the right arm wrong again.

Better, but still not quite right.
So even though it was easier to sew on the details using the second method, I'd go with the first method and close the open side and top of the felt first. It's easy enough to hide the ends of your thread/embroidery floss in-between where you sew the sides of the felt together.

Hiding a knot in-between the sewn-together sides of the felt tube.
In short, keep it simple and have fun!

Until next time --
Linda
2 comments:
Another fun, instructive post by the creative Linda!
You need to start writing a book on felt projects. What a great tutorial
Post a Comment