Showing posts with label beads. Show all posts

April 18, 2009

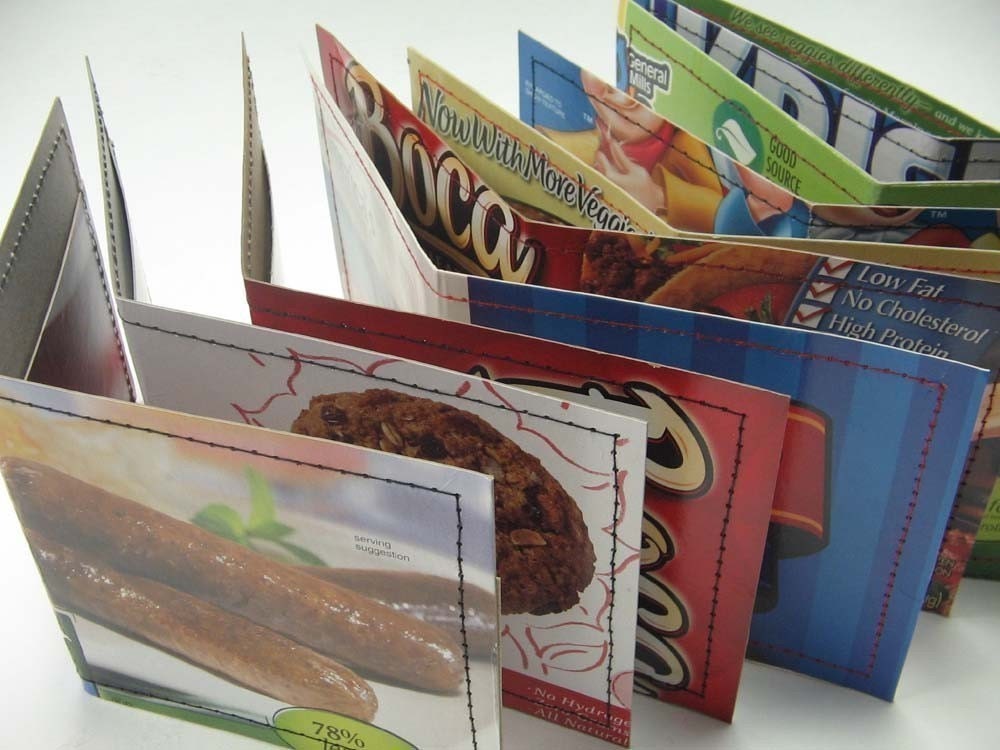
New Ways with Magazines


I've always tried to be a little earth friendly. I love recycled crafts because they are so much fun, and can be a real to challenge yourself, you know? So, here's a couple of fun things you can do with magazines. Personally, I love to use fashion mags best, but you can pick whatever you wish.

One popular idea on Etsy, is re-purposed envelopes. These are easy-peasy to make.

1. You don't need a template, just save the envelopes from the greeting cards people give you. Be sure to open it nicely so nothing rips.

2. Take the envelope apart, so that all the parts are laid out flat. This will be your template.

3. Whip out those old magazines, and trace the outline of the envelope on them. Cut it out, then fold and glue at the sides.

That is all there is to it! Easy, right? Simple! Using this method, you can make envelopes of any shape you want, too! That's the fun of it. You can get pages that have similar themes, like cakes, fashion clippings, things like that, and sell them together. Or get old bridal magazines, and sell the re purposed envelopes in sets.

Another cool idea is to use the images and words in magazines for collage work. My husband does that a lot. That's so much fun because every page can be used for something!

You can also make paper beads with recycled magazines.

There are two ways you can go about this: you can do the decoupage version, which is quick and easy, or you can get your heat gun, embossing ink, and ultra thick embossing powder and do it that way. Personally, I prefer the latter, but being a full time stay at home mom, I don't have the time. So I do it with Decoupage and Diamond Effects.

First thing you'll want to do is get yourself a good paper cutter. You'll also need Diamond Effects and a Decoupage medium.

1. You're going to cut your paper into 1/2" wide strips. Or however wide you want. Just remember that the width of the paper, will be the length of the bead you make. Got it? Good. So, cut up that paper! Each strip makes one bead, so cut away my friend!

2. You're going to use just a tap of glue (I prefer a glue stick, for less mess), and glue the end of the strip, then wrap it loosely around. When you get to within 1/4 to 1/2 inch of the tip, add a dab of a glue. You are going to be sitting there until this dries well enough to let go of, which is why I love my glue stick.

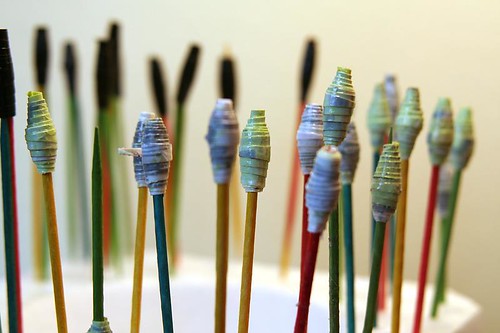
3. You can use wire to string the beads, then go over them with Mod Podge (decoupage medium), and Diamond Effects. But you can use anything! Depending on how tightly you wrap your beads, you can even use skewers, or something. But a nice sturdy wire works. I like to fashion a makeshift clothing line out of the wire to let the beads dry.

Voila! You have a paper bead. You can make pretty earrings, and all kinds of fun jewelry with it.
You can even paint them, or add glitter to it if you want.

Want more ideas?

Another cool thing you can do is make an end table out of magazines! Or, you can make gift bows out of them! What a cool idea! Don't feel like doing anything with them? You can always donate them to a local library, or nursing home or hospital.

Just use your imagination, and have fun!

The Craftaholic
Sweet Buddha Designs

April 16, 2009

How-To: Turn Bags into Beads

I've become somewhat of a curator of plastic bags. In fact, there are some doors you shouldn't open in my house because you will be buried under an avalanche of interesting plastic. Primarily, I fuse these bags into collages and turn them into other things like: BEADS.

If you would like to transform your own collection of plastic bags into beads, follow these instructions:

Materials

  • Clean plastic bag

  • Parchment paper

  • Iron

  • E6000 or similar glue

  • Toothpicks

  • Scissors

  • Ruler
Fusing the Plastic

Place two layers of plastic between two sheets of parchment on a hard surface and iron them together using a low setting with the steam set to off.

That will leave you with a sheet that looks like this:


Making the Bead


Cut out a triangular shape that is about 4 inches long and 1/2 inch wide at the bottom. You can play around with the sizing. The wider the triangle, the longer the bead and the longer the triangle, the fatter the bead.

With a toothpick, apply a thin layer of E6000 or similar glue to one side of your triangle. Leave a small strip free of glue at the base of the triangle. Place a clean toothpick at the base and roll up the triangle around the toothpick so it shapes an oval bead. Jiggle the toothpick a little to make sure that it doesn't stick to the bead.

Leave the toothpick in the bead and stick it into something to dry overnight. I used a dried out bit of Model Magic clay, but any kind of Styrofoam, etc. will work as well.

Once your bead is dry you can lacquer it or leave it as is and use it in a project like this:


or this:

Happy Recycling!

Simone
groundsel.etsy.com

April 11, 2009

How-To: Recycle Junk Mail into Paper Beads

bead tutorial, header

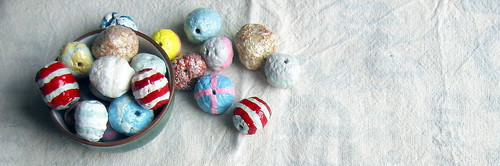
With just a few pieces of basic equipment, you can turn your boring old junk mail into cute paper beads! These lightweight, bulky beads are great for making fun chunky jewelry, festive garlands, or a bead curtain to hang in your doorway (if you're feeling ambitious!)


Equipment:

- Kitchen blender
- 2 Buckets
- Large bowl or tub
- Sieve
- Awl
- Cutting mat
- PVA (white) glue
- Acrylic gesso
- Acrylic paints
- Clear varnish
- Paintbrushes
- Paper for recycling.

For this tutorial, I loosely packed a 1-gallon bucket about 3/4 full with scraps, which yielded around 100 beads ranging in size from 1/2"-1".

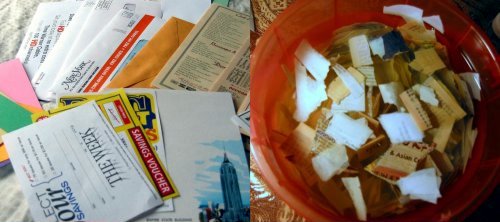
Ideal papers to use: anything printed on standard office paper, business envelopes, take-out menus with a matte finish, kraft paper.

Papers to avoid: glossy or coated papers such as magazine pages, waxed paper, newspapers and phonebooks (the ink is very messy and gross), facial tissue, paper towels.

NOTE: I recommend that you have dedicated equipment for home recycling/papermaking, rather than use the same items you use for food preparation. A good, used blender can easily be found at a thrift shop or yard sale. My rule is: if I use it for papermaking, I don't use it for food.

beadtutorial 1


STEP 1: Tear paper into 1" scraps. Make sure you remove any staples and all plastic windows from business envelopes. Place torn scraps in a bucket, fill with water, and let it soak overnight.

STEP 2: Now it's time to make pulp! Put a couple of handfuls of paper into the blender and fill blender about half-full with water. Blend until the paper has the consistency of oatmeal, about 10 seconds. Place sieve over second bucket, and empty blender into sieve. After the pulp in the sieve has drained a bit, manually squeeze out excess water before transferring pulp to large bowl or tub. Repeat this step until all your scraps have been pulped, drained, and squeezed.

STEP 3: Add a nice big dollop of white glue to the pulp, mixing it in with your hands.

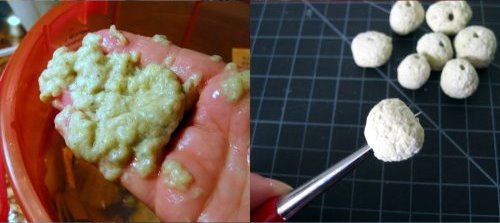
STEP 4: Roll yourself some beads! Take a bit of pulp and roll it into a little ball between your palms. This is the tricky part. If the pulp has too much water in it, it won't hold together. If it has too little water, it will be too crumbly to hold together, and your beads will break apart. Try rolling a couple beads and see how it goes. If the pulp is too wet to hold together, squeeze out more water. If the pulp is too crumbly, add back a little more water and some glue. You'll soon get a feel for the proper consistency, and it's easy to make little adjustments as you go. When in doubt, add more glue!

beadtutorial 2


Once you've formed all your pulp into little balls, let them sit in a nice, out-of-the-way spot until they are dry as a bone.

STEP 5: Put holes in your beads with an awl. Working on a cutting mat to protect your work surface, hold the bead steady between your thumb and forefinger and press the awl slowly and firmly straight down through the bead.

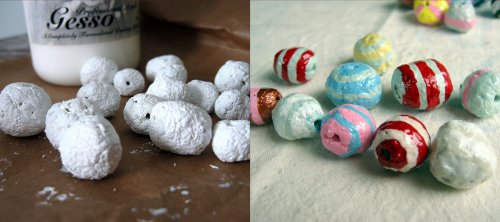
STEP 6: I like to prime my beads with a nice thick coat of undiluted gesso because it helps to smooth over the rough surface. This step isn't absolutely necessary, and you can go straight to decorating your beads with paint, if you want.

STEP 7: Grab your paints and brushes and go nuts!

STEP 8: When the paint is dry, you can brush on a coat of clear varnish to give your new beads a little added protection and shine.
beadtutorial 3

February 22, 2009

Tutorial: Using Beaded Jacobean Couching to Fill Embroidered Shapes

This embroidery technique is a variation on a stitch called "Jacobean Couching" that uses beads to give your project some added elegance. This project is not difficult, though it is helpful to have some knowledge of basic embroidery. Here are the materials you will need:

1. Embroidery Floss.
2. Seed Beads.
3. Regular sewing thread in a color that matches your beads.
4. A heat-transfer pencil.
5. An air-soluble pen (a pen that makes a mark which will disappear in a day or so).
6. A transparent gridded ruler.
PLUS, tracing paper, scissors, a home iron, fabric to embroider your design onto, and an embroidery hoop. For this project I used a 6" hoop.

STEP 1: Trace your design onto tracing paper using the heat transfer pencil. I chose an eight pointed star - you can choose pretty much any image you like, as this technique works well for filling any simple shape.

STEP 2: Iron the design onto your fabric. Use the hottest setting that will work for your chosen fabric, turn the steam setting to "off," and do not let your design shift while ironing. My design was transfered after about ten seconds of ironing.

STEP 3: Outline your design using any stitch you like. I chose to use the Stem Stitch, which is illustrated below. For this project, I did my stitching with three strands of embroidery floss. A handy set of illustrations for various outline stitches can be found here.

STEP 4: You are going to run a series of parallel threads over the entirety of your design. I chose a distance of 3/8". Using your transparent gridded ruler, make small dots right next to your outline, indicating where your parallel stitches should be placed. The ink should disappear in a day or so, but it's still best to keep your marks as small as possible.

STEP 5: Using the marks you've made, create a series of long parallel stitches that fill up your entire shape.


STEP 6: Decide whether you would like to end up with a shape filled with squares or diamonds. If you want squares, you should make your second set of parallel stitches at a 90 degree angle to the first set. I decided I wanted diamonds, so I chose a random angle, and simply made all my stitches parallel to the first line that I made at random.

STEP 7: Once you have filled your entire shape with a grid of long stitches, you can start adding the beads. Thread your needle with a double strand of regular sewing thread, then bring your needle up through the fabric right next to the place where two threads cross.

Thread a bead onto your string, and bring your needle back down through the fabric on the opposite side of the crossed threads.

To make sure your beads are securely stitched onto the fabric, bring your needle back up, and make a second stitch through each bead before moving on to anchor the next intersection of threads. Keep going until you've tacked down all your threads.

STEP 8: Admire the beauty!

February 25, 2008

Swarovski Crystal - A Short Note.

Besides reputation and wonderful marketing, Swarovski crystal is highly sought after over all other cut precision-cut crystal beads for their perfection in cut, clarity, and beauty.

The Swarovski Group (the "Company") was founded by Daniel Swarovski, an Austrian with a Polish last name, in Austria, when he was the first to create an automatic precision crystal cutting machine in 1892.

Also, the Company came to produce and still produces top-notch optical products (i.e., binoculars and telescopes), abrasives and grinding tools for the cutting and manufacture of crystals.

To maximize refraction, Swarovski crystals contain about 32% lead. However, in order to create a crystal that allows light to refract in a greatly enhanced rainbow spectrum, Swarovski coats some of its crystals with special metallic chemical coatings. Aurora Borealis ("AB") is one that is seen most often, and it gives off an enhanced rainbow effect on the half where the coating was applied. Other coatings include Dorado, Crystal Transmission, Volcano, and Aurum. Metallic coatings may be applied to only part of an object, as is the case with AB; others are coated twice, and thus are designated AB 2X, Dorado 2X, and so on.

Today, Swarovski beads are not only sold for jewelry-making, but their fame brought them into the realm of haute-couture, James Bond movies, international film celebrities and Oscar night fashion talk. Just go to the following URL to see such an example from an Oscar night: http://www.swarovski.com/content/10007.32553/Web_US/en

In 1973, the Company produced a paperweight and a key ring, as memorabilia for the 12th Olympic Winter games, which were then held in Innsbruck, Austria.

In 1974, designer Max Schreck 'accidentally' started a new product line when he created a tiny mouse out of chandelier parts. That tiny mouse was followed by a series of Swarovski crystal animals and decorative items, among them were the famous Swarovski crystal lovebirds.

Today, Swarovski's figurine collection Silver Crystal is another major branch of the Company.

In 1995, the Company celebrated its 100th anniversary, by building a magnificent theme park that was named, Swarovski Crystal Worlds ('Kristallwelten') in Wattens, Austria. That park was designed by the artist, André Heller, and it takes you into a land of incredible imagination and beauty, not to mentkion the exceptional park landscape which one has to see to really appreciate. Just go to the following URL to see what such park's outside landscape looks like: http://www.laurin.at/en-umgebung-swarovski_kristallwelten.shtml

The Company doesn't just produce the most sought after crystal in the world, but they also have collections for each season. To see the collection for Spring/Summer 2008, please go to the following URL: http://www.swarovski.com/content/10007.19128/Web_US/en

In 2007, the Company launched the product brand website, www.crystallized.com, which provides information and inspiration for people to design with Swarovski crystal beads.

CRYSTALLIZED™ - Swarovski Elements is the new product brand for Swarovski crystals, which come in a variety of sizes, shapes and colors. Products with Swarovski crystals are labelled 'Made with CRYSTALLIZED™ - Swarovski Elements', which is a guarantee of the originality of the Swarovski crystals used in the creations by jewelry designers on a small scale and by international fashion houses that use Swarovski crystals.

The Company encourages independent jewelry designers, interior designers, and all other designers who can incorporate their crystal into their product to utilize Swarovski crystals for unique creations throughout the world.

To learn more about Swarovski crystals or to join the Swarovski Crystal Society ("SCS Sociey"), please go to the company site at: www.swarovski.com