Blech! It sure has been hot and sticky this June! Even with all this glorious talk of travel and crafting on-the-go, sometimes it’s nice to settle down with an icy cool glass of lemonade in front of the AC and do some travel-inspired crafting in the comfort of your own home. To that effect, let’s make some handmade postcards! We can dream up collages inspired by faraway places, and then, our handiwork can do the traveling for us. This is a great, cheap, quick project to do with friends, kids, or by yourself, and the variations are endless. Most of the stuff you’ll use is probably already in your house!
All you need to get to work is:
- Something to cut with
- Something to cut up
- Something to stick stuff together

In this picture, I’ve assembled shoeboxes, scissors, magazines, clear tape, chip brushes, and every crafter’s best friend: Mod Podge! If you don’t have Mod Podge, I’d recommend running out to your local craft or art supply store to pick some up. This stuff is glue, sealant, and pretty shiny surface all in one! It makes all collage projects really sizzle, and you can even use it for jewelry projects and more. But, it’s not completely necessary to make postcards – you can use regular white Elmer’s glue, or even clear scotch tape or packing tape!
The first step is cutting out the basic postcard shape. If you have any shoeboxes lying around, they make excellent postcards. The card stock is usually the right thickness and they're typically white on one side (where you're going to put the address); plus, one shoebox is enough to make over a dozen postcards. Talk about upcycling!
The easiest way to prepare the shoebox is to remove the lid and cut down each of the four corners, from the lid to the bottom, so that you have one flat piece of cardboard.

Then, you can either trace a postcard you have, or just measure yourself. Many smaller shoeboxes already have great sizes built into the bottoms and sides.
****note! USPS guidelines dictate that your postcard must be between 3.5x5” and 4.5x6” – so if you want your postcard to be mailable without the risk of return to sender, heed these size restrictions!****

Cut out the rectangles with scissors, or an X-acto knife if you’re especially crafty. Frayed cardstock edges can be cleaned up by carefully running the sharp edge of the scissor/knife back and forth along the ends, perpendicular to the cardstock.

If you do NOT have any shoeboxes lying around, never fear! A clever alternative is to dive right into those magazines you’ve lined up for collage selections, cut out 4-5 postcard-size pieces from the front or back cover, and staple, tape, or glue them all together. If you use glue, be sure to use thin coats and wait for them to dry to avoid wrinkles.
Other places you might find usable cardstock/cardboard:
- Back of a legal or other notepad
- Junk mail
- Boxes of envelopes, cleaning supplies, frozen dinners, video games, … etc!!
Now comes the fun part – collaging!! Going with our travel theme, I thought about how fun it would be to yank people out of their advertisment-paradise. Perhaps Ms. Bikini Model would like to spend some time with a mound of dirt?? Cut or rip out the pictures, get creative! If you want to cover the postcard with a background, use the cardstock to trace the right size.

If you’re using Mod Podge or Elmer’s glue, the first step is to glue down the pictures with just a SMALL amount of adhesive. Less glue = fewer wrinkles!
Tip: if there's a nice, clean white side to your shoebox, and a brown or less nice side, glue to the
less nice side, and leave the nice white side for writing your message and address.
Then, if you’re using Mod Podge, the best way to apply it to the surface is with a handy chip brush. My 1” chip brush was literally 50 cents. Not a bad buy! Regular bristle brushes are totally fine, but need to be cleaned immediately to avoid permanent gunkiness. You can use your fingers if you’re low on time, money, or the motivation to go to the craft store (hey, it is really hot out there!!), just be sure to clean up your fingers! Oh, and please don’t let kids put glue/Mod Podge on their hands.… Pour a little Mod Podge out into a small bowl or jar, and spread it thinly and evenly over your pictures. You may want to start in the middle and work your way out to try to keep the edges as flat as possible. But wrinkles are bound to happen with cheap magazine paper! Embrace the wrinkle.

You can use normal Elmer’s glue here, but you have to mix the glue with equal parts water beforehand. This works VERY well with tissue paper, because it absorbs the watery glue. It’s not quite as good with magazine paper, especially since it sometimes stays a little cloudy even after it dries. But it will keep those edges down and provide a slightly more even surface. You can always just glue underneath and leave the edges to the mercy of the post office!
Packing tape can be a really fun way of attaching pics too! It gives it a nice industrial effect – good with maps, newspaper, and other less glossy materials. Instant shine! Be aware - there will be some tape overlapping to the white side. Work with it :)
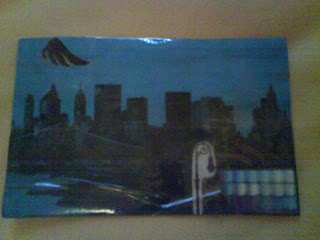
The very final step is making sure you have a surface to write on! After all, postcards are all about communicating. If you used a plain white shoebox, you’re good to go! Felt tip pens write most easily, but you could always use ballpoint pens, markers, pencils….
If you used magazines or any cardstock that isn’t white, you can just paste in a plain sheet of printer paper, notepad paper, or any other salvaged paper that’s free of extraneous typing remnants. A secret source of glossy white paper can be found in magazine ads – just look for VW, Apple, or other such classy products! There’s much white space to be found if you do a little flipping.
If you’re fantastically crafty, you may even have gold and silver fabric pens. They write on anything, even multicolored magazine ads.

And now you’re done! You can collage all kinds of things onto your postcard … ticket stubs, photos, tissue paper, even little bits of fabric. Send some memories to a friend – just be sure to add 27 cents for postage!!