May 30, 2009

Potato and pickled beet salad

My husband was very anxious to kick off the barbecue season this year, partially due to a gradual change in my cooking habits in recent months which introduced vegetarian dishes to our dinner menu. Even though I enjoy a good steak once in a while, I love all the veggie-loaded side dishes. Potato and Beet salad is one of my family's and friend's favorites.


Ingredients:
1 can of Goya dark kidney beans
1 jar of Greenwood sweet & tangy sliced pickled beets
1 red onion
4-5 medium potatoes
Salt & pepper to taste
Mayonnaise

Recipe

Peel and dice the potatoes, place in a pot covering with water, add salt and cook on medium high until soft. Drain and let cool.

Drain the picked beets and cut into pieces.

Add diced red onion and drained red kidney beans.

Mix in mayonnaise and season with salt and pepper to taste.


Over the years, I have tried many brands of dark kidney beans and pickled beets, and learned that the ones I used in this recipe have the best flavour and texture. To make the salad a bit more sweet and tangy, I sometimes add a bit of liquid reserved from the pickled beets.

I hope you will enjoy this recipe, it truly is the perfect addition to an outdoor menu.


~ Mirela
Jantar Handcrafted Jewelry

May 29, 2009

Where to Find the {NewNew} May 30 + 31

The {NewNew} is going national! Not only can you check them out in Brooklyn this weekend, but a large contingent will be in Philadelphia selling their fun and funky wares. Road trip time!

At the annual Art Star Craft Bazaar, shoppers can expect clothing, jewelry, prints, accessories, bags, dolls, hats, craft supplies, housewares, stationery, sculpture, fine art, ceramics, glass, baby items and more. Check out Cakehouse, MayLuk, KimmChi, Fubabee, The Hand Of Fatima, Better Than Jam, and KnitKnit. Location: Philadelphia, PA at Penn's Landing Great Plaza on Columbus Boulevard between Walnut and Chestnut Streets. Saturday & Sundy, 11am-6pm.

The Brooklyn Flea continues this weekend in Fort Greene on Saturday (Location: Bishop Loughlin Memorial High School, Lafayette Avenue between Clermont and Vanderbilt Avenues) and DUMBO on Sunday (81 Front Street). Fabulous {NewNew} vendors will be there, so be sure to visit both locations. Fort Greene Line-Up: Jantar, WarpeDesign, AlexandraFerguson, and PulpSushi. DUMBO Line-Up: lelephantrose, YaniaCreations, and aStudiobytheSea. Saturday & Sunday, 10am - 5pm.


LuCrafts, WabisabiBrooklyn, and JournalisticTendencies will be at the Brooklyn Indie Market this weekend, so if you haven't stopped by this great market yet be sure to do so tomorrow. Location: Red and white tent at Smith and Union Streets, Carroll Gardens. Saturday,11am-7pm.

Artists and Fleas in McCarren Park continues this Saturday, featuring great designers in a beautiful outdoor location. Saru Star will be vending at this fun outdoor event. Location: North end of McCarren Park, adjacent to the McCarren Field, Brooklyn. Saturday, 10am - 6pm.

Have a fabulous weekend!


Karina
WindowsOfAgate

May 28, 2009

Simple Cucumber Salad


I will admit that I have a serious love affair with cucumbers. I use pureed cucumbers in my cucumber & aloe soap. I also try to eat lots of salads during the summer, and they would not be complete without some cucumbers! I get so excited when spring/summer comes around because they are in season and reasonably priced at the supermarket.

Unfortunately, cucumbers don’t have the best shelf life, and they would often go bad before I could eat them. I found a simple recipe for pickled cucumbers that will keep for at least 3 weeks in the fridge, so now I can load up on cucumbers when they are on sale!

4 medium cucumbers
1 medium onion
1 large green sweet pepper (or red or yellow for a bit of color)
½ cup of water
1 cup of white vinegar
¾ cup of sugar
1 tbsp dried dill

Peel & slice the cucumbers, onion, and sweet pepper. Place in a bowl with a tight fitting lid.

Bring the water and vinegar to a boil in a saucepan. Add the sugar & stir until completely dissolved.

Pour mixture over the cucumbers & add dried dill.

Place the cover on the bowl and shake. Let the cucumbers chill in the fridge overnight, and enjoy the next day!

-Nordea
Nordea's Soaperie

May 27, 2009

MEET {NewNew} Diana of Sweet Buddha Designs


I recently had the pleasure of *virtually* sitting down with Diana Gonzalez of Sweet Buddha Designs. I learned quite a bit about her artistry and spirituality--plus I reinforced my love of gchat. With Thai food on my plate + Diana’s 2 year old, Dakota, on hers, the Internet brought us together while paying attention to our individual priorities. Sweet Buddha Designs is eco-mindful, utilizing natural yarn and recycled papers. Diana describes her aesthetic as “Martha Stewart, Janis Joplin and Courtney Love visit a Buddhist Monastery and get crafty.”

How did you decide on the name Sweet Buddha Designs ?
I collect religious deities: Hindu, Catholic and Buddhist. I'm a spiritual person, and don't believe in labels, but I follow Buddha's teachings. I wanted laughing Buddha designs but it was taken on etsy so I went for sweetbuddha.

Do you have a creative mentor? What inspires you?
Well I don't think I have a real mentor. I guess that I don't believe so much in a real like . . . person to look up to. I was taught from an early age that people will always let you down, but faith in a higher power is something that never fails. My inspiration is the world around me. I find myself inspired by nature, by the practicality of life, and the things needed in life . . . and city life; the city really inspires me a lot too. The things I create come to me; I really feel like they come to me by muses and good spirits that guide me . . . sounds crazy, but then, I am a little nuts.

What was the transition like from crafter to etsy seller?
Well, I’m an entrepreneur at heart. I started making soap and my husband suggested that I try selling it. So I did for years, until it got too common and too expensive for me. I decided to do paper crafting and crocheting until I had the money for soap making, then lost interest in the soap :)
[Crafters everywhere can relate!]

Do you have a favorite item you make now?
Honestly my favorite items are the ones that don't sell! The cards are what I love. People love my stamps and cowls, but I so enjoy making cards. I put so much of myself into them.

Where would you like to go next, creatively?
I want to create an empire, lol. Not really. I want to design more items, hats, gloves and things, and more paper items . . . just branch out. As far as my paper items, I want to start creating things to empower other people to create, like more hand carved stamps, unique paper supplies, and craft supplies.

So what is a typical weekend like for you?

Juggling my little one, my husband, yoga, and finding the inspiration to make things that I love.
Bikram?
I do Kundalini yoga.

Do you craft with your daughter?
Oh my daughter is 2 tomorrow*! She's a bit young to do crafts now, but I do paint with her!
[tomorrow* relative to interview timing]

Big plans for the special day?
Hubby is making a pinata for her, I'm going to do some potato stamps, and we're going to have the kiddos make some potato stamp art.

Diana concludes with her true passions and inspirational side project:
Life is art. Art is the world around you. Money doesn't matter. None of that matters. What matters is what you make matter. For me, all that matters is my family and my art. I consider it my mission in life to teach others to heal through art. I consider what
I do to be an art and I went through quite a bit in my life, and learned to heal through art. I taught myself that spirituality and art can go together. And so I made it my mission to teach others. I have a meetup group for this reason, and am in the beginning stages of writing a book about it.
[The meetup] is called the NYC craft circle.
I originally started it to get to know other artists, and I have. I try to teach people about the law of attraction through the craft projects we do. We make shrines, do altered books, and things like that all using the principles of the law of attraction.

For more, check out the Sweet Buddha Designs shop and Diana's blog.


- lisa


May 26, 2009

How To Make a File for Your Record Collection

If you are anything like me, you have quite a few record albums sitting on your shelf. While I really love the way some of my favorite songs sound when they are played on my ancient record player, I don't really love the way they look cluttering up my shelves. I spent some time searching the internet for a great storage solution but nothing really suited my style, so I decided to create my own. Please feel free to click on the photos for a larger view.


Materials Needed
• 14" x 14" x 4" cardboard box
• x-acto knife with space blade
• Pencil
• Ruler
• Packing Tape
• Double sided tape or spray mount
• Decorative paper or fabric


Step #1. You can certainly make one of these files, from a flat piece of cardboard, but I decided to repurpose a 14" x 14" x 4" box because the folds are already done for you. Lay the box down; it should naturally fold like the diagram in step 1. We begin by cutting off the top and bottom panel on the left side (only cut the first layer of panels...it helps if you slide a cutting mat inside the box to prevent accidentally cutting the other side of the box.) Flip the collapsed box over and repeat. Your box should now look like the photo in step 1.

Step #2 Now cut off one of the skinny strips as shown by the red dotted lines in Step 2. You can then set that piece aside for recycling. Your box should now lie flat like the photo in step 2.


Step #3 Because the box we are using (14") is a little too big to fit vinyl records in snugly, we are going to trim down our structure. Measure 1.5" from the back top, and from the front Top. Make sure to mark this with your pencil before cutting. (Remember: measure twice, cut once)


Step #4 The shape of your flat structure hasn't changed much from step 2, but that is about to change. Measure 4" from the outside edges on the back panel as shown in step 4 and mark that with a pencil line. Also measure 5" from the bottom of the back panel (the bottom is where it attaches to the rest of the structure and mark that with a pencil line as well). We are then going to cut along the lines, stopping when we meet an intersecting line. The shape we are creating is reminiscent of a football goal post by removing the waste piece we just cut out as shown in Step 4.


Step #5 In order to make our file look similar to the ever-popular magazine files we need to create a diagonal cut for the sides of our record file. As shown in step 5, we are going to measure 3" from the back top and mark that with a pencil on both "prongs" of our football goal post shape. Then with your ruler and your pencil draw a straight diagonal line from the corner point, shown in diagram 4 to the outside point of your previously penciled line. At this point you may want to refold your structure into its box form to make sure it fits together, you can also then continue the diagonal pencil line onto the front top panel it matches up with. Then you can cut along the diagonal pencil lines, remove the waste and continue on to step 6.


Step #6 Your structure should now look like the flat structure in Step 6. At this point we fold together the box at its natural folds and begin to tape up the structure. You want to make sure you tape both the inside and outside edges with your packaging tape for a nice sturdy hold. Now you have your finished structure, and the finishing is all up to you! I used my finished piece as a template to cut panels of decorative paper to cover the sides of my record file. I fastened the paper with some double stick tape, but a spray adhesive would also work as well.

I can't wait to see how you decorate your new vinyl record organizer. Be sure to upload your finished projects to flickr and tag it with newnew_recordholder. 

~jen pepper


Art For A {NewNew} Office

The worst part about a three-day weekend? Coming back to work!

None-the-less, duty calls. And as I recently realized, just cause you're in an office all day doesn't mean you have to look at bare walls. Whether you're in a cubicle or the corner office, you can always change your view with a digital stroll through (and a few purchases from) all the visual art the {NewNew} has to offer on Etsy.


Jenna Newton makes original art in many different media (pen and ink, paint, watercolor, just to name a few), at different sizes and price points. Whether you need a big painting in your big corner office, or a something slightly smaller scaled -- say cubicle sized -- she's got you covered.


Iris Lavy's shop, ArtbyIris, features both big, color-saturated canvases, as well as smaller-sized prints of some of her pieces.

CLineCreations is all about the Chinese arts in Brooklyn. Her brush paintings will bring a little bit of nature, delicately rendered, into your work space.

prismPOP offers a bold, pop sensibility perfect for a modern office. And if you want something truly personal, send her a hi-res pic and she'll make you a custom POP-portrait.

Randolph Pfaff makes fine art photographs of urban scenes. Just cause you don't have a window, doesn't mean you can't change your view.

PoofNY photog Anne Kristoff offers a lot of different views to choose from in her collections of fine art photography.

And the list goes on! I wish I had more space to list all of the wonderful fine art from the {NewNew} you'll find on Etsy. Where ever or whatever your workspace, look for the {NewNew} to find just the right art for your walls.


-- persuede.etsy.com

May 25, 2009

Out & About on the LES - Enjoy a Spring Afternoon

I live on the edge of Chinatown/NOHO/Nolita and the Lower East Side just off the Bowery at Rivington. One of the things I LOVE about living here is that it is at the nexus of all these neighborhoods and that a mere walk around the block can turn into an outing for the afternoon.

If you don't live nearby, not to worry - the F train will drop you off at 2nd Avenue and you will be in the mix of it all.

The National

Any good walkabout for me starts with making sure I have a delicious cup of coffee in hand. My new favorite spot is "The National" on Rivington between Bowery and Chrystie. Julie Dickstein is the proprietress and is a fierce coffee perfectionist. She "pulls" amazing blends by Counter Culture and will make them up hot or cold.

Info: 8 Rivington (between Bowery and Chrystie)

Sara Roosevelt Park

Coffee in hand, walk East to Chrystie Street and you are smack in the middle of serious soccer action. The soccer field at Sara Roosevelt Park is always buzzing. Take a seat on one of the park benches that line Chrystie and Forsyth and relax. Even if you aren't a soccer fan, it is great fun people watching.


Also in SR Park is a public garden with a great history. M'Finda Kalunga Garden ("Garden at the Edge of the Other Side of the World" in the Kikongo language) was named to honor an African American burial ground petitioned for by the "Sunday Black Men" in 1794. The park keeps funky hours - Thursday afternoons, Saturdays and Sundays. However, here's the good news - you can work your way toward a set of keys and your own plot. Through an apprenticeship program (show up, ask for Bob, begin weeding) and by showing your dedication to the garden's upkeep, you can earn your spot.


Info: http://www.mkgarden.org/
Sara Roosevelt Park at Rivington (between Chrystie and Forsyth)

After getting your hands dirty - or just sitting in the garden - round out your LES afternoon with a trip to a neighborhood landmark. Bluestockings Bookstore was founded 10 years ago this June by a dear friend of mine, Kathryn Welsh. Fresh from Tulane with a vision to change the world, Kat and an army of volunteers dug out a store front on Allen Street and turned it into Bluestockings, then a woman's bookstore - a rarity even for NYC at the time. Bluestockings is under new ownership, but still carries on that fierce, indie spirit. You can find radical reading or a best seller, vegan cookbooks and indie-zines. They also have a fair trade cafe. There is such a good vibe here: sit, read, chat, snack, plan to take over the world.

Info: http://www.bluestockings.com/
172 Allen Street (between Stanton and Rivington)
F train to 2nd Ave.


Andy http://www.msslippers.etsy.com/

May 24, 2009

Easy Recipe For Rooftop BBQ


When I was young I enjoyed eating Chicken Satay from the street food stalls in Hong Kong. Whenever I barbecue, I always make this fast, easy and popular treat. It is well suited for the urban rooftop barbecue.

Here is an easy recipe for our readers. Grilled pineapple is a good compliment to the chicken satay.


Chicken – 1 lb - cubed
Bamboo Skewers – soaked in soy sauce

Marinade:
Soysauce – 2 tbsp
Mirin (Japanese Sweet Cooking Seasoning) – 1 tbsp
Satay Powder or Curry Powder – 1 tbsp
Sriracha Hot Chili Sauce – optional – to taste

1- Mix marinade in a bowl and fold in the chicken.
2- Skewer the chicken and marinate for 2 hours.
3- If you are taking the chicken to a park, you can freeze the portions for the journey.
4- Makes about 6 – 8 skewers. Serve with lettuce and cucumbers.


-May Luk Ceramics

May 23, 2009

The {NewNew} + DanceAfrica = Good Times!


This weekend is the venerable outdoor/indoor performance/market fest at BAM known as DanceAfrica. A Memorial Day weekend tradition, DanceAfrica is packed with dance, music, art, and film events—plus the one-and-only DanceAfrica outdoor bazaar.

The Bazaar, which is a sprawling two-block music-and-food-filled outdoor affair at Lafayette Ave and Ashland Pl in Brooklyn, features over 250 vendors from around the world. Artisans, traders and even a {NewNew} Etsian or two converge on the streets surrounding BAM, transforming the neighborhood into a global marketplace offering Africa, Caribbean, and African-American food, crafts, and fashion. Rain or shine!

This year ButtaflyUnltd will be out in full force with her classic crochet hats and inspirational tees.

Check it out this Memorial Day weekend:

Sat, May 23, 12noon—10pm
Sun, May 24, 12noon—8pm
Mon, May 25, 12noon—7pm


Enjoy!


-- persuede.etsy.com

May 22, 2009

Wardrobe Refashion: T Shirt Quilt


Everybody knows somebody with an overwhelming amount of t-shirts. They just collect more and more and can't seem to part with any of them. My ex was one of those people. Even if a shirt had a hole and/or stains, there was no way we were cleaning out the closet using a garbage bag. I came up with a solution for our problem, bargaining that we would make his shirts into a quilt. It came from an earlier idea I had of making a "home-sick" quilt, using my father's old t-shirts and sweaters.


While researching quilt making, I found that this is not an original idea. Many people have turned their t-shirt collections into a warm and toasty quilt, and there are many different quilting patterns that you can use to construct you own special security blanket.

I am absolutely not a quilting expert. I made my own very simple pattern of a square "block," large enough to fit most the images on the front of the shirts. I just cut up all those tees, sewed up all the squares, and then sewed on a back with some stuffing inside. I know that is totally not enough instruction for you. So here are the simplest instructions possible that I found on wikiHow.com:
  1. Choose a pattern and fabric. You can look online for free quilt block patterns by using a search engine. You can also look in books or talk to people who you know that have made quilts. Selecting your pattern may affect what fabric you would like to use, or vice versa. A whimsical pattern of animals or flowers might look better in bright solid colors, or a quilt of your old baby clothing might look better in a more traditional pattern.
  2. Some quilters like to pre-wash fabrics and say that this prevents color runs and takes care of any shrinking. Others prefer not washing fabric, since it can be easier to cut and lets you get started more quickly. Either way, treat all your fabric the same -- wash it all or don't wash it all. If you opt not to wash, you may want to test a small amount for color fastness by putting a snip in warm water and seeing if it runs. If it does, you'll need to wash it to get the extra dye out.
  3. Cut out your pattern. This is a very important step. You need to be very precise. If you don't cut the pieces right, the quilt block won't line up correctly. The best way to get an accurate cut is with a rotary cutter, a self-healing mat, and a quilter's ruler. These make all the difference in the world.
  4. Sew each block together using a 1/4" seam allowance. You can mark your sewing matching throat plate with a piece of masking tape to ensure that your 1/4" seam allowance is accurate. Some machines have a quarter inch foot that makes this easy. Most patterns will come with directions, telling you how to assemble the pieces together. Usually you want to put the pieces together so that you are always sewing a straight line. It is difficult to sew around corners. More advanced techniques such as appliqué, where you fold the edges under to sew a curvy piece on top of the block, should wait until at least your second quilt.
  5. Once you have all the blocks made (how many you make will depend on how big they are and how big of a quilt you want to make) you should decide if you would like to put borders on the quilt. Many quilts have strips of fabric around all of the blocks as well as a border or two or three around the outside edge. This is a great way to make up square footage on the quilt if you didn't feel like making up enough blocks for the entire size that you want. Cut long strips of fabric and sew them to the blocks, once again trying to always sew only straight lines. Use these strips to sew all of the blocks together until you have one large piece. Then sew the outside border pieces on.
  6. Select your batting. Batting comes in several different shapes and types. High loft batting is thicker and will make a "poofier" quilt. Low loft batting is thinner and may be easier to quilt, but it won't be as warm. There is also fusible batting, which can be ironed to the top and bottom pieces, sticking to both, so you won't have to baste.
  7. Select your backing material. This is usually a large piece of solid fabric. If you are making a large quilt, you may need to piece together full widths of fabric, since fabric usually comes in 45" or 60" widths and a queen size quilt may be 66" square. If you would like to use the backing material to edge the quilt, make sure the fabric is a couple of inches too big in every direction.
  8. Baste the three layers (top, batting, backing) together. If you bought fusible batting, you will just need to iron the three layers. But, if you bought regular batting, you should lay out the three layers on top of each other, select a contrasting thread (so you can remove it easily later) and sew the three layers together. Start in the middle and work your way out in each direction, smoothing out any wrinkles as you go. A great substitute to basting is using safety pins. Put them every 3-4", starting at the center.
  9. Once all the layers are together, you need to use a matching thread, or contrasting if you like the look, and sew the layers together. Start from the middle and work your way out, trying to use small, even stitches. You will get better as you practice, and no one will ever notice if you are a little messy. The quilt block pattern may have included quilting directions. If it didn't, you usually just "stitch in the ditch." This means you follow all of the seams in the quilt block and borders, keeping your stitching about a quarter of an inch away from the seam. You might also ask at your local quilt shop for someone who does machine quilting. You give them the top, batting and back and they'll quilt it for you on a long-arm machine. You'll still need to put the binding on (see below).
  10. Remove the basting (if necessary) and finish the edges of the quilt. You should trim all of the layers so that they are the same on the edges (if you want to use the backing fabric, just trim it so that it is an even inch and a half longer than the other layers all the way around). You can buy bias tape to sew along the edges. This you will sew lengthwise on one side all along the edges, then wrap it around to the other side and sew again. Or you can use the backing fabric, just fold in the raw edge, fold it over to the top of the quilt, and sew it down all the way around. With either method, take your time on the corners, as they are a little tricky. Just keep messing with them, folding in the extra fabric, until they look good.
  11. If you would like, you can sign the corner of the backside of the quilt with the date and your name. You can also include the name of the pattern or who the quilt is intended for if you would like. Write lightly with an ink that won't wash out.


-Karin of Better Than Jam

Memorial Day Weekend Sales!

Have some extra time during the long weekend? Check out these NewNew shops and treat yourself to these Memorial Day Weekend Sales! Offers apply May 22nd through the 25th.
  • http://DirtyLovesClean.etsy.com - Choose from the following codes, Enter _______ in message to seller: Freebalm- your choice of 1 lip balm from 'I have a Dreamsicle', 'My Dear Marzipan', or 'Oatmeal Cookie Monster'. Freesoap- sachet bag filled w/ assorted (3-5) soap samples. Freesachet- free herb sachet bag filled with either lavender buds/flaxseed or peppermint/flaxseed, your choice. Memday- 10% off entire order, refund will be made after your purchase.(One code per customer).
  • http://CLineCreations.etsy.com - 10% Off All Orders
  • http://MSwedowsky.etsy.com - Free US and International shipping on all purchases! Receive 10% off entire order when purchasing more than one item. No promo code required--just wait to pay and I will send you a revised invoice through PayPal that reflects the 10% discount.
  • http://JournalisticTendency.etsy.com - 10% Off All Orders
  • http://PandaWithCookie.etsy.com- Welcome summer with a swell new tote bag to take your books and bagels to the beach! Purchase an $18 tote bag with a $5 pouch for $20. Purchase a $22 tote bag with a $5 pouch for $24. I will send a new invoice after purchase.

  • Free shipping:
  1. http://www.KimmChi.Etsy.com
  2. http://PCharming.etsy.com
  3. http://PrismPop.etsy.com
  4. http://WaiSze.etsy.com

Where to Find the {NewNew} May 23 + 24

We may finally be getting some warm spring weather this weekend, so come out, enjoy the wonderful borough of Brooklyn, and check out the {NewNew} while you're at it!

The Brooklyn Flea is the place to be this weekend. Come by the Fort Greene location on Saturday and the DUMBO location on Sunday. The following {NewNew} vendors will make it worth your while:
Fort Greene (Saturday): NordeaSoaperie, Jantar, AdornmentsNYC, and BetterThanJam. Location: Bishop Loughlin Memorial High School, Lafayette Avenue between Clermont and Vanderbilt Avenues.
DUMBO (Sunday): WishByFelicity, MilkMade, and WarpeDesign. Location: 81 Front Street. 10am - 5pm.


Also on Sunday, check out Persuede at the Addy&Ferro Dance Africa Pop-Up Boutique from 12 p.m. - 8 p.m. @ 672 Fulton Street (between South Elliot & South Portland St.)


Have a great weekend!


Karina
WindowsOfAgate

May 21, 2009

Socrates Sculpture Park

Socrates Sculpture Park


On the far west side of Queens, overlooking Roosevelt Island and Manhattan, is a very special, and dare I say, magical place, located in my very backyard of Long Island City/Astoria.

It’s called Socrates Sculpture Park and it is one of the best spring and summer destinations in NYC for families, couples or to wander around on your own.

Once upon a time, Socrates Sculpture Park was an abandoned riverside landfill. In the 1980’s it was transformed into an outdoor exhibit space and studio by a group of artists and members of the community. Today it serves as a world renowned outdoor museum and artistic workspace, as well as a multifaceted activity park.

The best part about the activities on offer is that they are all free of charge and available several times a week during the spring and summer, with some continuing into the fall.

There are educational art workshops, a film series, and a weekend fitness program including yoga, capoeira, pilates and more!

It’s all just a short hop from Manhattan on the N or W subway lines to Broadway, and then a 10 minute walk.

For more information on all the Socrates Sculpture Park has to offer, please visit: http://www.socratessculpturepark.org/

At a Glance:

PARK HOURS: Socrates is open 365 days a year from 10am until sunset. Click here for sunset times

ADMISSION: FREE

DIRECTIONS TO SOCRATES SCULPTURE PARK: N/W to Broadway (Queens)

ADDRESS: 32-01 Vernon Boulevard at Broadway, Long Island City (Queens), NY 11106


by Lorina Pellach-Ladrillono of The Original Beadscarf &


May 20, 2009

Chocolate Chip Pear Bread


I have a baking buddy. I think everyone should have one. Each of us adds something to the mix - and the result is usually really good - it's different every time!

My baking buddy, Lisa, & I came up with this recipe. We've been baking breads together since last summer and take bits and pieces from different recipes and put it all together.

I wanted to make a pear bread & my buddy added the key ingredient that I think makes this bread so good - ground cloves! It gives it a very light, almost minty flavor. Hope you like it as much as I do - it's my absolute favorite!

Combine:
1/3 cup brown sugar
3 TB unsalted butter or Ghee (softened)
1 cup unsweetened applesauce

Mix dry ingredients, add to above mixture & crack 2 large eggs into it:
2 cups flour
2 TB unsweetened cocoa powder
3/4 tsp. ground cinnamon
1 tsp. ground cloves
1 1/4 tsp. baking soda

Fold in:
3/4 cup chopped walnuts
3/4 cup dark chocolate chips
1 large Asian pear or 2 smaller pears peeled & cut into chunks

Bake at 350 degrees in a loaf pan (9x5x3) for 1 hour. Let it cool & enjoy!


Nguyen/KnitKnit

The {NewNew} Fiber Art Shops

For more Accessories from the Metro New York area - search: newnewteam, fiber art on Etsy

The {NewNew} Ceramics Shops

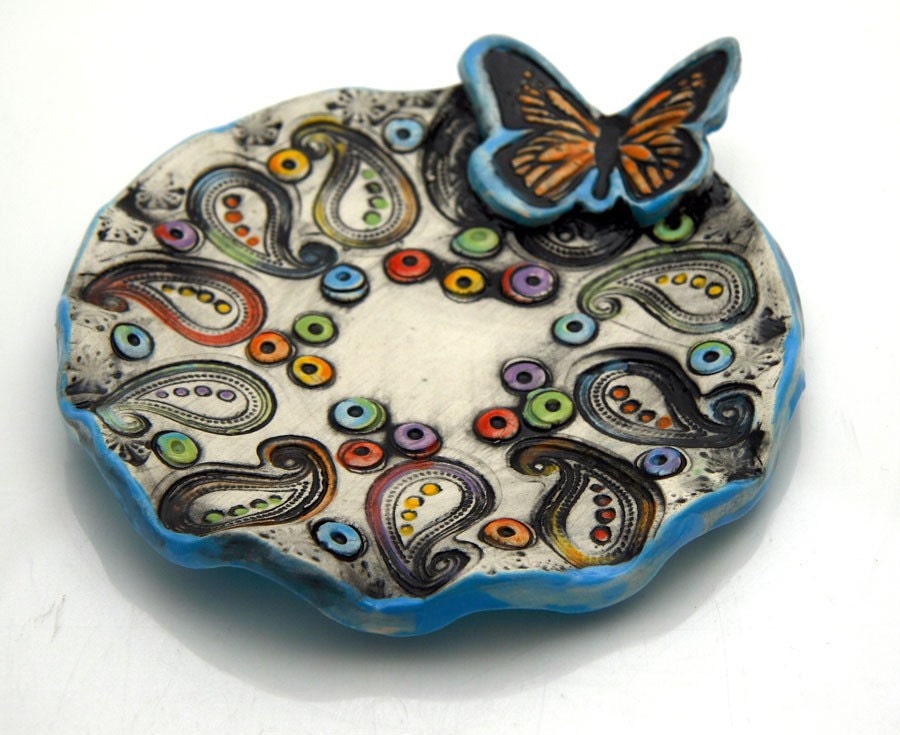
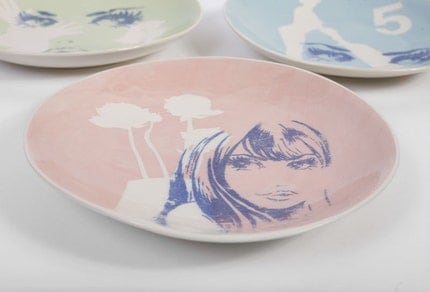
For more Accessories from the Metro New York area - search: newnewteam, ceramics on Etsy


Lenny Mud - In the infamous words of Popeye, I yam what I yam. My mom was a potter. I made my first pot at her knee when I was age three. I left it for awhile when I got older, but damn if Demi Moore and Patrick Swayze and Unchained Melody didn't pull me right back in.

May Luk - I enjoy working in clay because it is artistic as well as scientific. My love of glaze and colors led to many hours of experimentation. Each piece is a series of creative decisions and technical endeavours.

My work expresses the enjoyment of hand-making in the form of usable items that embody human creativity and individuality. I hope you will enjoy them and be happy and rewarded to the same degree that I am!