Showing posts with label being green. Show all posts

August 17, 2009

{New New} August Green

Every month has a shade and for August that shade is green. From the luscious green color of the grass in city parks to the overwhelming number of block parties and street closures, August is when NYC comes together to embrace and embody everything that is green. Whether you choose to celebrate this August by living green, eating green, or shopping green the {New New} has got you covered. So get in the green spirit and check out the following collection of organic, green items handcrafted by individual members of the {New New}.

Tea and Cucumber Vegan Soap - made with all natural ingredients and packaged using eco-friendly materials by dirtylovesclean


Olive Green and Yellow Flower Print Pouch - made with material recycled from an old skirt by pandawithcookie


Green Peridot and Gold Ring - made with 100% recycled gold by luisfernando


Greeting Card. Organic. - made with 100% cotton rag Aurora Natural cardstock by studiopetite


Organic Cotton Baby Booties - made with 100% organic cotton yarn by smallestfriend


Cassandra Candlestick Necklace - made with materials from an old candlestick and decorated with live plants by mcflashpants


-by Karla
luisfernando

April 28, 2008

how-to: re-using paper

i love finding ways to recycle paper that are more interesting than putting it in the recycling bin. i use newspaper to wrap presents and clean my windows and mirrors, print documents on the back of old flyers, line my ironing board with scrap paper when i iron on fusible interfacing to keep the sticky interfacing from gooping up my ironing board cover....

one kind of paper that always seemed to me to be begging for a good recycling is packing paper. you know, the thin-ish paper that you would use to wrap up your breakables when you move, or that comes as padding in a package. it's such nice paper, but always so crinkled post-use. i wondered if it could be ironed (without setting fire to my ironing board) and brought back to useability... so when i saw an offer on freecycle for a few boxes full of used packing paper, i jumped at it.

recycled paper tags

i set my iron to medium-low and gave it a shot, and it worked great!

recycled paper tags

the wrinkles weren't completely gone, but it was flat enough to work with, and really i like the way the wrinkles remain and give it texture.

i had an inspiration for its first use, now that it was relatively flat: as wrap tags for my napkins and coasters, which would bundle them together neatly, show off my logo, and identify them all in one fell swoop.

so the next question was: could i run it through my printer? i started by cutting it into printer-appropriate size on my paper cutter.

recycled paper tags

then crossed my fingers and ran it through. and...success! here it is after another trip through the paper cutter:

recycled paper tags

i'll admit, i did have one paper jam out of ten printings. but that's a ratio i can live with. and look how cute my products look in their new outfits:

recycled paper tags

i can think of tons of other uses for ironed used packing paper—flyers, small banners, wrapping paper (in fact, i already wrapped some presents in it this weekend....)—and i'm sure all you crafty people can think of lots more...share 'em in the comments section, please!

- cakehouse

April 20, 2008

DIY Green Cleaning Products


One of my earliest memories is of walking along a sandy winding road in Sicily with my paternal grandmother when I was three years old. She had a glass bottle in her hand that had just been emptied of the last of its olive oil. We stopped at her outdoor laundry room - a tub complete with cold running water - and she filled the bottle about half way. What she did next blew my little three year old mind - she bent down, gathered a handful of pebbly sand, which she dropped down the bottle's slender neck. Holding her palm over the opening, she then proceeded to vigorously shake the bottle for several seconds, finally dumping the entire contents back onto the ground, refilling the bottle with water for a final rinse-and-spill to clear out any remaining grains of sand.

And voilá: the bottle was spotless!

Somehow, though our grandparents kept clean and tidy homes without employing cleaning products that have nightmarish lists of health warnings, most of us are only now realizing that you can find much of what you need to clean your home in the pantry.

Here are a few simple recipes, along with some go-to multi-taskers to help you clean your abode without harsh chemicals. I think nonna would have approved!

Multi-Tasker 1: Club Soda
  • Poured into a spray bottle, club soda holds its own against much harsher and pricier all purpose cleaners.
  • Since it is alkaline, it's especially adept at getting out acid-based stains, like coffee.
  • Also a great window cleaner.
Multi-Tasker 2: White Vinegar
  • On its own in a spray bottle, a killer disinfectant.
  • Mix two teaspoons in a quart of warm water to use as a window cleaner.
Multi-Tasker 3: Baking Soda
  • Used dry, it's a great appliance cleaner; wipe it off with a damp sponge.
  • Sprinkled in an oven and spritzed with water, it makes a good (if slow-working: it needs to sit overnight) oven cleaner. After it sits, wash it out with water.
Simple Recipes

Drain Cleaner
1/2 cup salt
boiling water

Pour salt down the drain, followed by boiling water. Run hot tap water until clog clears.
_______________________________________________________________
Toilet Bowl Cleaner
white vinegar
baking soda

Sprinkle bowl with baking soda and spray with vinegar. Scrub with a toilet brush
_______________________________________________________________
Air Freshener
2 cups hot water
2 tablespoons baking soda

Mix baking soda and hot water in spray bottle until baking soda dissolves. Spray those nasty odors away!
_______________________________________________________________
Copper and Brass Cleaner (I use this one to shine pennies before decoupaging them and making earrings)
vinegar
salt

Dissolve 1 part salt to two parts vinegar. Soak till shiny. To use as a scrub, increase salt to make a paste and scrub your little heart out!
_______________________________________________________________
Laundry Detergent
one part washing soda
one part borax

Mix and use as you would regular laundry detergent.
(Note: both washing soda and borax are available at soaps gone by)

-MaryAnne, wabisabibrooklyn.etsy.com

April 15, 2008

HOW TO: resuscitate that old t-shirt!

as i've mentioned here on the {newnew} blog before, one of my favorite forms of recycling is wardrobe recycling, aka wardrobe refashioning. instead of heading to h+m when you feel like you have nothing to wear, why not shop in your closet instead, and re-make something that doesn't fit anymore—or just doesn't fit your current style?

one of the easiest places to start refashioning is with t-shirts. we all have them: the t-shirts we don't wear but can't seem to let go of. here's what i did with one of mine.

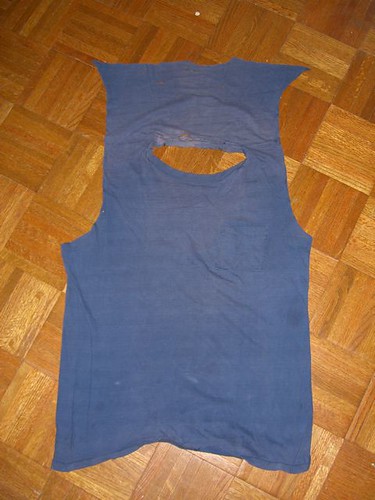
this was part of my college uniform:

refashion

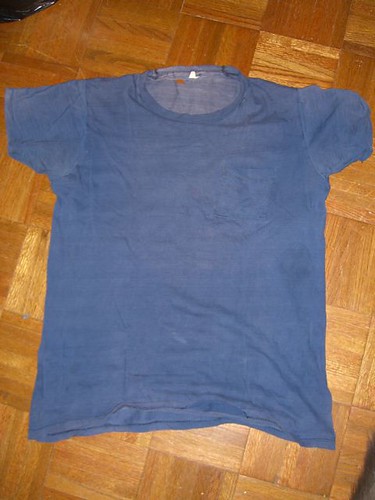
not only is it ridiculously big (as all of my clothes were back then), it had developed some issues in the back....

refashion

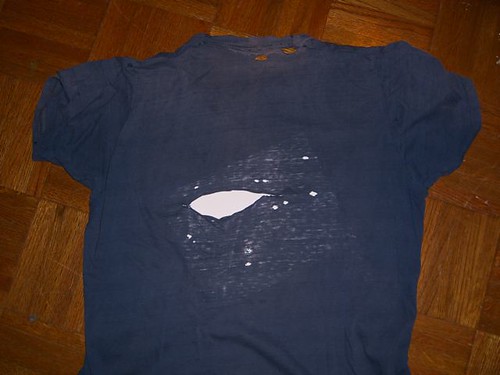
...and so had since been relegated to the pajama drawer. but i never wore it, because i was afraid it was just going to keep ripping and completely fall apart. clearly, it was time to dismantle it myself.

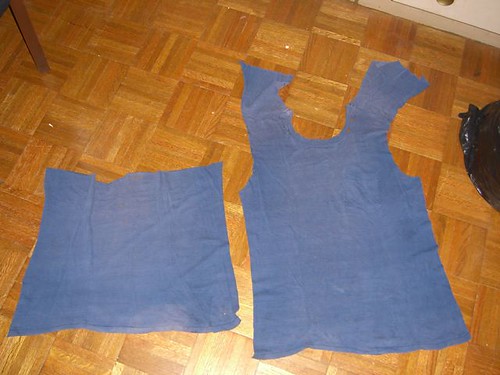
i started by removing the sleeves, then cutting across the back horizontally at the spot of the enormous gaping hole, leaving me with this:

refashion

then i cut down the sides vertically, making two pieces, and slit the part of the back that was attached to the front down the middle, comme ca:

refashion

i decided that those two pieces coming off the top of the front piece would become straps, so i trimmed them a bit to make them slimmer and equal widths, and hemmed the edges. i also turned the neckband under in the front and stitched it down to make a uniform hem all around.

then i put it all together: pinned the side seams and sewed them up, hemmed the top of the back piece, attached the straps to the back, and hemmed the front piece— which had ended up longer than the back—at the bottom. and this is what i got:

refashion

refashion

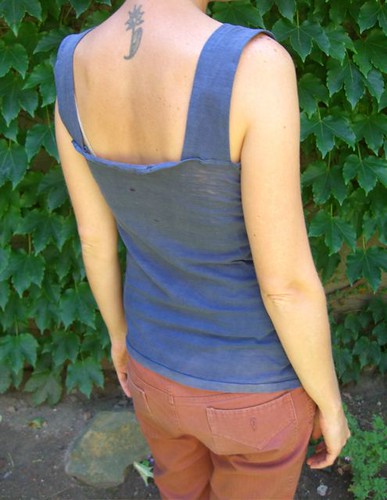
putting it on, i realized that the part where i had hemmed under the existing neckband stuck out...

refashion

...and i was going to fix it by turning it under one more time and re-hemming, but then i realized that i liked it the way it was. i also love that the finished product retained some of the pinholes and frayed edges of the original shirt.

and so something destined for the scrap heap became a fab, totally original "new" top.
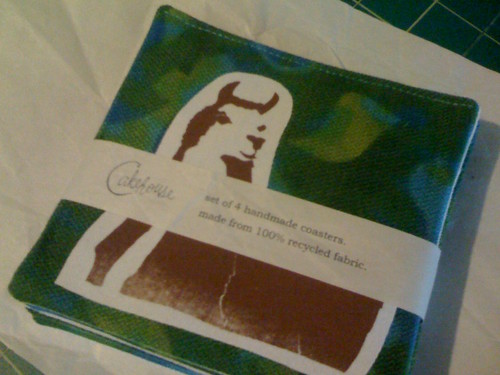
- cakehouse

March 3, 2008

Wardrobe Refashionistas

Like a lot of people, maybe you've been looking for ways to be more green. You've ditched the Clorox and the Lysol for the Seventh Generation and the Method, you're filling the fridge with organic apples from Long Island instead of strawberries flown in from New Zealand (and carrying them home in cloth bags instead of plastic), you're keeping the thermostat set low, you've filled all your sockets with the twirly lightbulbs.

But how eco-friendly is your closet?

I'm not talking about buying organic jeans from Bono—I'm talking about a way to apply your creative and artistic talent to reducing your fashion footprint. Wardrobe Refashion is an online community of people who have pledged to "abstain from the purchase of 'new' manufactured items of clothing" for 2, 4, or 6 months. Instead, they promise to "refashion, renovate, recycle preloved items...in fabric, yarn or other medium for the term of [their] contract." You're also allowed to buy new fabric and yarn to make clothes, and to buy handmade clothes, so Etsy shops are fair game! Shoes are exempt, as are underwear, though you're "encouraged to have a go at making those." (Hey, if Daniel Day-Lewis can do it, so can you.) Members then post their projects on the Wardrobe Refashion site, which makes it great for novice sewers, as there are lots of tutorials and inspiration.

Wardrobe Refashion was started by an Australian woman named Nicola Prested. She "wanted to save money, make less of an impact on the environment, increase my sewing skills and define my own style rather than buying off the rack what everyone else is buying," so made a personal decision not to buy new clothes for six months. She wrote about her experiment on her blog and asked if others would be interested in getting in on it—and got 60 takers. One of them suggested she start a group blog for everyone making the no-new-clothes pledge, and Wardrobe Refashion was born. A Refashion Flickr group has also been formed, if you'd like less text with your photos.

So check it out, maybe start light with a 2-month pledge..... I'm on month 8 and not looking back.

- Kristen
cakehouse.etsy.com