April 30, 2008

The {NewNew} In April - wrap up

The {NewNew} York Street Team has been very busy this spring combining their resources to promote Earthday, sell together at the new Brooklyn Flea market, donate team gift baskets to two local schools and meet up on April 14 for the team's first ever Team SWAP.

The {NewNew} live and in person!
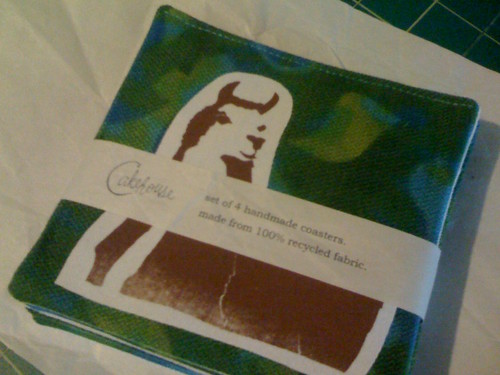
Kristen of Cakehouse has done a fantastic job of leading the team's Brooklyn Flea efforts. Coordinating tables and tents for the 14 or so vendors that will be rotating participation throughout the month of April. Despite freezing cold weather the first Brooklyn Flea group sold on April 6, with more participants rotating in and out on April 13, 20 and 27. The Brooklyn Flea is located in Fort Green Brooklyn at 176 Lafayette Ave. Rotating shops include: cakehouse, Citybiz, DewOnAPetalHome, Dripstick, EmilyEJewelry, Fubabee, JTSTitches, KarensMonsters , Kimmchi, MetalSugar, MiraArtz, MTLopez9, NordeaSoaperie, Vyphuisdesigns, and wabisabi brooklyn.

Besides the shared table at the Flea, the team had a shared table with Etsy at the inaugural BUST Spring Fling Craftacular where Kimm of KimmChi and Josh of Dripstick manned a table full of Team and Etsy goodies, some giveaways and an eclectic mix of handmade merchandise - necklaces, tee shirts, tote bags, wristlets, art and jewelry.

Ania of Honorata and Danielle of CollectiveElements did the first ever Handmade Faire in Waretown, New Jersey on April 20th.

The generous Joanne of JoanneTracyDesigns kindly opened up her house to the April team meeting which was designated a supply, clothes and merchandise SWAP. It fit right in with the theme of recycling and conserving for Earthday with members bringing everything from ribbon to wine bottles [empty of course *wink*]. http://www.flickr.com/photos/joannetracy/

The {NewNew} loves the Earth

To promote Earthday and Green living in general the team filled their blog during the entire month of April with various tutorials, tips, and products that emphasized green living and materials. YoursTrulyxoxo, BeadScarf and Cakehouse featured their product's green appeal and KimmChi, BrooklynSoul, Hamsa Custom Crafts , MTLopez9, PulpSushi and Cakehouse gave us tutorials on re-using materials like junk mail, scrap fabrics or aluminum cans and transforming them into something new and totally usable. And NordeaSoaperie, WabisabiBrooklyn and Cakehouse all gave us great natural solutions for kitchen and personal cleansers.

The {NewNew} hearts Schools
Kristen of Cakehouse, Kimm of Kimmchi, Wai Sze of WaiSze, Iris of ArtByIris, MaryAnne of wabisabi brooklyn, Ania of Honorata, Karen of KarensMonsters all joined together to create a donation basket of their products that was included in as silent auction to benefit Hannah Senesh Community Day School.

The {NewNew} in the Press
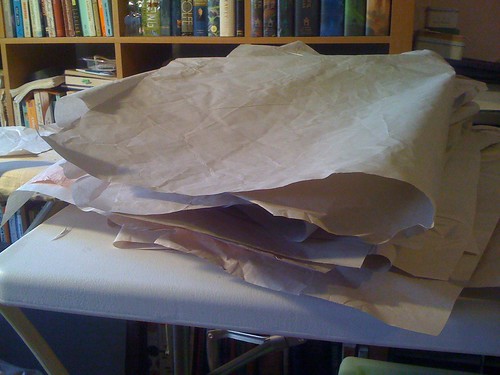
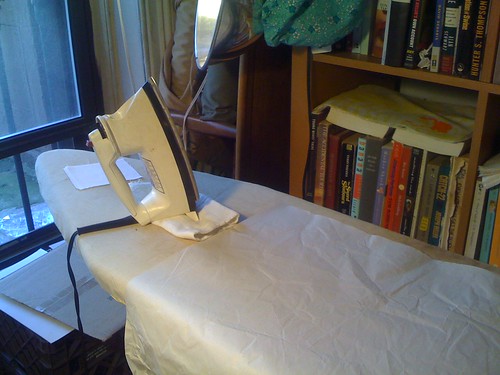
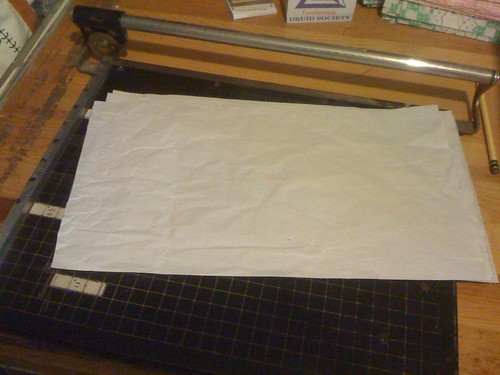
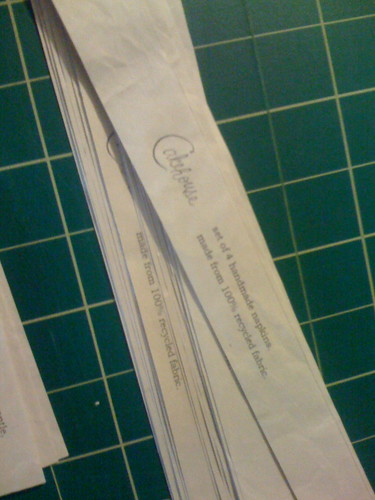
Craftzine picked up Kimm of KimmChi's tutorial on paper making that highlighted the group's Earthday promotion on re-using materials on April 3.

10 Days later, they picked up Angie of BrooklynSoul's craft tutorial on turning aluminum cans into elegant jewelry.

9 Days after that they featured wabisabi brooklyn's tips on using making green cleaning agents.

And then 3 days after THAT they picked up PulpSushi's great tutorial on re-using old magazines and bottle caps to make magnets.

Kristen of Cakehouse was featured on DesignSponge which made me realize that DesignSponge, like Kristen, does not use capitals.

wabisabi brooklyn was mentioned in a Brooklyn Flea review by Only The Blog Knows Brooklyn on April 28.

Kristen of Cakehouse was reviewed on Docce.

And Lisa of of Fubabee's notecard's were listed under Mother's Day Gifts in the Chicago Tribune.


-----------------------
Beth Shorr of bshorr has volunteered to learn the ins and outs of code copying and keep up our myspace presence.

MaryAnne of wabisabi brooklyn has volunteered to be a blog admin, doing general maintenance, adding tags as well as helping to organize blog promotions.

Marilyn of PulpSushi will be helping out with web graphics to advertise the group and promotions, like our great "We Ship Internationally" badge.

Stephanie of Bungaloe has offered to help with any hand drawn graphics as well as the mailing out of press releases.

And Jen of JTStitches has assumed more new member responsibilities; checking the team email as well as sorting their Etsy Minis into the appropriate categories.

-----------------------

For May, look for the {NewNew} at the new May Brooklyn Homeshow on May 17 at 170 Tillary Street, Suite 706 as well as Sundays throughout may at the Fort Green Brooklyn Flea. As well as at the Hoboken Art and Music Festival on May 4 and Spring Crafts at Lyndhurston May 2, 3 and 4 and the Village Crafts and Small Artwork Fair on May 17 . May 16 and 17 mark this summer's Etsy Weekend at Williamsburg's Artist's and Fleas, so check us out there as well. Check back for our month-long wedding promotion with lots of tips, tricks and personal stories, as well as our match up the the California Crafters of Etsy for a nice little mash up.


-Kimm
KimmChi.etsy.com

how to: save that old bangle!

Somewhere between high school and college, I developed this obsession with silver jewelry. Maybe it was the overabundance of door knocker earrings, fat gold chains, and four finger rings dominating my high school culture that turned me off to the shiny yellow stuff. (Not that my mom ever let me wear anything cool or hip anyway.)

During college I searched for interesting silver pieces to complement my "special" sense of style. Now, eleven years after graduation, they're sitting in a jewelry box tarnishing away.


So how could I save the old pieces of jewelry that oxidation claimed? I decided to refashion them by crocheting over them with scrap yarn. This way I can use remnants of yarn I have laying around and recycle jewelry that has sentimental value. Want to make your own crocheted bangle?

Start by cleaning up some of the tarnish. You can do this by first lining a glass casserole dish with aluminum foil. Place your jewelry on top of the foil and sprinkle liberally with baking soda. Pour boiling water over the jewelry till its covered. (It's going to bubble and fizz but that's normal.) Let sit for ten minutes, then rinse with cold water. This baking soda bath will clean some, if not all, of the tarnish off. Now comes the fun part.
Supplies Needed:
  • Bangle Bracelet
  • Size J Crochet Hook
  • Small Ball of Yarn
With yarn and hook:
1: Chain 30.
2. (Now we'll connect the yarn to the bangle. ) Hold the bangle in the same hand you are holding your leading yarn.

2. Start to single crochet into the second chain. Insert the hook under the top loop of the second chain from the hook, as shown in the photo (do not count the loop already on the hook when determining which chain is the second chain from the hook.

3. Yarn over hook and pull through first two loops on hook. At this point, you have 2 loops on the hook. Yarn over and pull through the remaining loops to finish a single crochet.


4. Continue working your way across the row, attaching the yarn to the bracelet by repeating steps 1 - 3 to the end of your chain.

5. Slip stitch the end of your row to the top of the beginning of your row. Fasten off and weave ends. Ta Da!!!

If you don't have a silver bangle, use a plastic or wood one. Whatever you have handy is fine. You can certainly adapt the directions to a smaller bangle, or a bangle of different material. You can also use different weights of yarn for this project. A lighter weight of yarn or thread will result in a lighter feel of the design.

There are many other ways you can crochet over jewelry to create new and interesting pieces. Crochet over old rings with thread to add a dash of color. Add earwires to a thinner bangle to make earrings that pop!


These beat any old doorknocker earrings!

Experiment with different ideas and make your old jewelry new again.

Danielle
Collective Elements

April 29, 2008

Reusing old materials in traditional crafts

This past week I had the opportunity to travel to Brasstown, North Carolina to take a class at the John Campbell Folk School. In honor of Earth Day, the Folk School led a week of classes focused on earth-friendly crafts. Some classes foraged around the school campus for discarded items to use in their projects, and other classes took old objects and made them new again. On the final evening of the week-long school, each class presented what they made; the beauty of these crafts has inspired me to look around my home for old items to transform. Take a look at some of the work created during the week.....

Lauren Kingsland and Kim Jalette taught a class focused on making quilts that incorporate old t-shirts, creating beautiful new pieces as well as a type of functional scrapbook. The students in this class were extremely committed to their projects, working beyond the usual six hours a day, often staying in the sewing studio until late hours of the night.


Before my week at the Folk School, I'd never given kaleidoscopes much thought, but the kaleidoscope-making class wound up being one of the more talked-about classes of the week. Using an imaginative array of recyclables such as pill containers, water bottles, and kid toys, the class made kaleidoscopes that were fun to look at and fascinating to look through.

Kim Joris led a mixed-media art class in which students were asked to bring in some of their old unused art works. The end result were a collection of new pieces made using students' old paintings as well as scraps from a variety of materials otherwise intended for the recycle bin.


'The Art of Re-use' was the class which proudly spoke of scavenging through trash. The art they created was inventive and dimensional with an aged patina:


My class focused on making wood jewelry. We used scraps of wood discarded by other craftspeople, such as hardwood scraps from woodturning and furniture-making. Here are some of the pieces I created:


The John Campbell Folk School operates year-round with weekend and week-long classes in traditional crafts, music, cooking, and dance, with a particular focus on arts from the surrounding Appalachian area. Work-study and scholarship opportunities are available.
--Joanne------

April 28, 2008

how-to: re-using paper

i love finding ways to recycle paper that are more interesting than putting it in the recycling bin. i use newspaper to wrap presents and clean my windows and mirrors, print documents on the back of old flyers, line my ironing board with scrap paper when i iron on fusible interfacing to keep the sticky interfacing from gooping up my ironing board cover....

one kind of paper that always seemed to me to be begging for a good recycling is packing paper. you know, the thin-ish paper that you would use to wrap up your breakables when you move, or that comes as padding in a package. it's such nice paper, but always so crinkled post-use. i wondered if it could be ironed (without setting fire to my ironing board) and brought back to useability... so when i saw an offer on freecycle for a few boxes full of used packing paper, i jumped at it.

recycled paper tags

i set my iron to medium-low and gave it a shot, and it worked great!

recycled paper tags

the wrinkles weren't completely gone, but it was flat enough to work with, and really i like the way the wrinkles remain and give it texture.

i had an inspiration for its first use, now that it was relatively flat: as wrap tags for my napkins and coasters, which would bundle them together neatly, show off my logo, and identify them all in one fell swoop.

so the next question was: could i run it through my printer? i started by cutting it into printer-appropriate size on my paper cutter.

recycled paper tags

then crossed my fingers and ran it through. and...success! here it is after another trip through the paper cutter:

recycled paper tags

i'll admit, i did have one paper jam out of ten printings. but that's a ratio i can live with. and look how cute my products look in their new outfits:

recycled paper tags

i can think of tons of other uses for ironed used packing paper—flyers, small banners, wrapping paper (in fact, i already wrapped some presents in it this weekend....)—and i'm sure all you crafty people can think of lots more...share 'em in the comments section, please!

- cakehouse

April 26, 2008

An Eco-Friendly Accessory

Alright ladies, you all know you do it, and some of you men too out there with your ties. Someone gives you a gorgeous silk scarf or tie, and you love it, but does it ever see the light of day? My guess is not so much. I’m guilty too! Those scarves are so amazing, but how to wear them? So we just tuck them away in our closets or drawers in the hope that someday they may be used. Or we lie to ourselves, saying that we will make a pretty cushion cover out of it, or wrap our hair-dos in it. But instead, the scarf makes many friends back there in that drawer since chances are, we’ve collected more than a few of these treasures.

Well have I got a solution for you! Not only is it eco-conscious, it’s also fashionable, can be sentimental, and has a catchy name too! The Original Beadscarf® is a great way to recycle your gorgeous scarves into a beautiful one-of-a-kind accessory that you can wear anywhere!

I can use any size scarf for these creations. By carefully manipulating a scarf around recycled beads, I create an adjustable length accessory that can be worn as a necklace.

You may have seen similar styles before. However,
The Original Beadscarf® can be custom made from scarves and ties that carry sentimental value. I have been commissioned to create Beadscarves with materials that previously belonged to grandmothers or late husbands.

Since it is made from repurposed materials The Original Beadscarf® is an eco-friendly accessory. It's environmentally responsible, and it makes a statement that everyone can relate to.

So go on, dig up those ties, scarves, skirts, blouses or other silk fabrics you’ve tucked away for a special project. The Original Beadscarf® is the special project they’ve been waiting for!

-Lorina
BeadScarf.etsy.com

April 25, 2008

'Green' Clothing Collections


As part of a conscious approach to Design I have opted to use unwanted fabrics in the clothing collections I design and create. Every season is different and every garment is unique. I begin by scouting the fabric stores in the garment district, 35th, 36th, and 37th streets between Broadway and 7th. You’ll see me diving under tables, and inside giant cardboard boxes to look for fabric that is in usable condition, by usable I mean I can wash it, rip it, sew it and/ or paint it. Once I find fabrics I coordinate color stories including the various fabrics mixed together and the trimmings I will add later. You can see this in the pictures below. The colors are approached as if they are finished garments on the rack, how do they look next to each other? what is the presence of the colors as a full collection? what is most attractive to a customer? This aids me in making a decision on whether I use the fabrics as accents or as full garments. Once this is set I usually choose 1-4 items, tops, bottoms, or dresses, which I will make with variations on silhouette or trimmings. Creating a few items is useful because I want to be at an affordable price and make my producing time smooth. This also allows me to design smaller capsules within each color or trim idea, with minor variations like a big shirt with a square, scoop, or a u neckline. Also in this manner the collection can be expanded and items can easily be mixed and matched.

I approach the Design process by being inspired with fabric and trim first, I then do lots of research on style and finally I add my favorite crafting finishes. The silhouettes are kept simple to allow the craft details to stand out. Part of the ‘think green’ movement is not just to create instead of buying for yourself or others but to also cut down on the demand of more fabric, try finding unwanted fabrics, and also trimmings, that will stand the wear and tear of creativity and keep them from being dumped in a landfill this is a truly conscious way to Design and craft.

The {NewNew} on Sunday April 27

We've got a busy Brooklyn weekend ahead of us! On Sunday April 27, BUST Magazine is hosting it's first Spring Fling Craftacular at the The Warsaw in Williamsburg (though it's really Greenpoint) at 261 Driggs Avenue. Come out to see Kimm of KimmChi and Josh of Dripstick who will be selling their items as well as other items by team member shops BeadScarf, JTStitches, MiraArtz, and MTLopez9. We'll have some etsy freebies, lip balm buttons and Lab Schedules


Also on Sunday, our team will be holding down the fort at the Brooklyn Flea this Sunday from 10am to 5pm at 176 Lafayette Ave in Fort Greene Brooklyn

Our vendors for this Sunday's Flea will be:
EmilyEJewelry
Fubabee
KarensMonsters
MetalSugar
Vyphuisdesigns
WabisabiBrooklyn


April 23, 2008

Don't toss that cap!

It really is hard to follow some of the amazing posts dedicated to Earth Day this month at The {NewNew} blog. I was thinking hard What could I contribute? Then it hit me....BOTTLE CAPS!!!

We see it all the time at bars and parties - bottle caps getting tossed to the side and forgotten about. Poor things, so much potential use gone to waste. Bottle caps can be used in so many different ways. From scrapbooks to self adornment, the humble bottle cap is ripe for reuse. Today I want to show the very easy process of creating bottle cap magnets.

What you'll need:
  • 1 quarter
  • Picture
  • Bottle cap
  • Resin
  • Scissors
  • Pencil
  • Glue
  • Magnet

    First, it's a great excuse to go out and buy some Stewart's Orange Creamsicle Pop


    I like to use old desk calendars as my designs (saving some paper while we're at it!) but of course you can use anything (ie: old magazines are great too!).


    The size of one quarter is a perfect fit for the inside of a bottle cap. This is what I use to measure the image I wish to cut out.


    You see it's a perfect fit! Next comes probably the hardest part of the project (which isn't hard at all) and that's mixing the resin together.

    Resin? Wait a minute, how are you helping the environment using that stuff?

    I understand your concern, but there are earth-friendly resins available that are less petroleum and more water-based, even corn resin (also known as polylactic acid or PLA). Moving along, you follow the instructions provided on the box - usually it's just mixing one part resin, one part hardener. Slowly pour your resin into the cap, do not fill it to the top or it will get pretty messy.


    I use a toothpick to try to pop any big air bubbles that may appear and to also keep the image flat on the bottom, it will want to push up to the surface so you must keep an eye on it for the first couple of minutes or else it will dry unevenly. Let the caps dry overnight. Once ready simply glue the magnet cap to the back and presto! Your own unique magnet!


    Feel free to use other parts of the image in other new ways too...


    Marilyn ~ pulpsushi.etsy.com

  • A {NewNew} How To: Patchwork Blanket - Combat Global Warming with Style

    While I was thinking about what to contribute to our Earth Day blogging, trying to come up with a project that anyone could do, the idea of patchwork blankets kept coming to mind. I thought maybe it was too late for a tutorial on making blankets as it is almost May, but here in NY it has still been very cold, and we just had a blog posts on Salvaged Designer Fabrics and on our Pre Earth Day Team Swap. It actually seemed to make sense. I have made these simple patchwork blankets for myself, for friends and family and so I decided to share this “how to that anyone can do” with you.

    As a scenic and costume designer for theatre I have always had lots of bits of fabric from various projects around. Many of the pieces of fabric I had were too small to make anything out of, but too nice to throw out. Some reminded me of specific shows I had designed and I wanted to give them all a new life and save them from the garbage.

    If you have access to a sewing machine and can stitch a straight line you can do this project. No patterns, very little measuring. Easy. Eco-friendly. Fab. Here’s how:

    1) Gather your fabrics and decide on a theme or color palette. You can use any kind of fabric – You might have things around the house just dying for a new life. Here are some ideas:

    Leftover fabric scraps
    Vintage fabrics
    Favorite shirt or blouse that got ripped or got a stain (concert t-shirts, etc.)
    Your favorite sweater that you accidentally shrunk in the wash.
    That article of clothing that doesn’t fit anymore. (must have shrunk too!)
    That gift item that you were given but never used.
    Any nice fabric bits that need a new life

    2) Decide on the size of your squares. For this blanket you don’t need lots of the same fabric. For the blanket pictured I cut 7 & ½ inch squares based on the scraps I had available. I only have 1 square of some fabrics, 2 or 3 of others, it doesn’t matter – you can use whatever you have. To decide the size of your squares just look at the smallest scrap that you want to use and don’t make your squares smaller than that – it’s that simple.

    3) Trace out your squares & cut. I cut a square template out of the cardboard from the back of a used notepad. Trace around your square template to get all your squares a uniform size. If you are careful in keeping your squares the same size everything will line up easier when you stitch it all together. Cut your squares out on your lines. (To see how many squares you will need see step #4)

    A NOTE ABOUT FABRICS:
    If you are a beginner – here are some tips to keep this project simple: Use fabrics that are somewhat similar in weight and consistency. Don’t use fabrics that are too thick or heavy or too thin. Or, if you want to use a lighter weight fabric back it with something more stable, like a basic shirt-weight cotton. You can attach them together with a fusible product like “Stitch Witchery” or just attach them together as you zig or surge the edges. You can also back fabrics if you want to use something that is sheer or lacey. It’s best to keep woven fabrics “on grain” – this just means place your template so that the threads of the fabric are going the same direction as the edges of your template. This isn’t an absolute must, but will make it easier to stitch as your fabrics will be more stable and not give and stretch.

    4) Decide on the size of the overall blanket. You can make this type of blanket any size you want. The one pictured is 8 columns/10 rows of squares - about 48 inches by 62 inches. It is narrow enough that I was able to use a single solid width of fabric for the backing. You can decide on your overall size based on what you want to use as your backing and how much fabric you have available or the size of blanket you want. Once you know the size of the blanket you want to make you can easily do some basic math and find out how many squares you need.

    5) Zig-Zig stitch over the edges. Once you have cut out all your squares I recommend doing a zig-zag stitch around the edges or serge them if you have access to a serger, but don’t trim the size down as you surge so they will still all be the same size. This will help keep them from fraying and make the blanket more durable.

    6) Compose your blanket design. I just lay mine out on the floor. If you have a tile floor you can use the tile grid as a guide to help you layout all your squares. I usually start by spacing out my lightest and darkest squares and then fill in with the other squares, but you can compose your blanket in any way you like. I like mine to be somewhat random, but I generally avoid having two squares of the same fabric very close to each other. You can arrange them in any way you like.

    7) Stack it. Once you have placed all your squares to compose your blanket you are almost ready to start sewing. Take the first square of your first column and stack it on top of the next square down, then stack those two squares on the third one, and so on. This will make sure you keep it all in order and maintain your composition. When you have stacked your first column, just pin it all together with a large safety pin through a post-it note and label it “column 1” and continue to the next column. Once you have all of your columns stacked in order and labeled you are ready to sew.

    8) Stitch your first stack into a long strip. Place you first square from the top of your first stack on your table and place the second square on top of it, with the faces together. (If there is a pattern or top/bottom to the fabrics be sure to maintain this as you stitch things together.) Stitch the two squares together ¾ from the edge. (the bottom of square #1 to the top of square #2, face to face) Continue like this going through your stack top to bottom until you have one long strip of squares. You may not even need to pin these if you are comfortable with sewing and depending on the size of your squares. If you are a beginner a few pins doesn’t hurt. (keep each of your columns marked with the number so you can maintain your composition.)

    9) Repeat step #7 for each column/stack.

    10) Press your seams open. From the back of your strips just press all of your seams open flat so that the seam allowances are pushed out away from the actual seams.

    11) Stitch your columns together. Place column #2 (now a long strip) face to face on top of column/strip #1. You will probably want to pin things together here. As I pin things together, edge to edge and face to face, I make sure that I am matching up the four corners nicely. Once it is pinned, stitch the two strips together, ¾ inch from the edge as before.

    12) Repeat step #10 until all of your columns are attached and you have the front side of your blanket as one nice, big patchwork.

    13) Press your new vertical seams open, as you did before.

    14) Top stitch (optional) At this point you may do some top stitching if you like, it’s a nice detail, but not necessary. From the front of your blanket stitch straight top-stitch lines to both sides of your stitch lines. As you stitch, make sure that your seam allowances stay pushed out away from the seam. Top stitching like this will keep those seams nice and flat. Top stitch both your vertical seams and your horizontal seams. It will look like this:

    15) Attach a backing. At this point you are ready to attach a backing to your blanket. I have often used an interesting textured corduroy or something else soft with a little body in a similar weight to the front of your blanket. All you have to do is lay your backing fabric out on the floor (or table) face up and place your patch work face down on top of it. Line it up nicely and pin the edges together. Trim your backing down to be a little bigger than your patchwork front. Then just stitch around the outside, (with ¾ inch seam allowance as before) leaving about 12 inches open on one side. You now have an inside-out almost finished blanket. Pull the blanket through the opening so that it is no longer inside out. Admire.

    16) Press the outside edge flat and make sure your corners are pushed out. You may need to trim the seam allowance at the corners down a bit to make them less bulky and then push them out with something pointy (but not sharp) so they are nice and square and crisp.

    17) Stitch the opening closed by hand with a nice tidy stitch.

    18) Top stitch around the outside as you topstitched on each side of your seams.

    19) Admire your new fabulous eco-friendly hand-made one-of-a-kind blanket.

    20) Make popcorn & get cozy under blanket. Enjoy!


    April 22, 2008

    HOW TO: Eco-Friendly Label Making!

    As a new member of The {NewNew} York Street Team, I decided to offer up a quick and fun little tutorial on one way of making eco-friendly tags or business promotional pieces, all from scrap materials... What follows is my tutorial:

    What You'll Need:
    •Scissors or an X-acto Knife
    •Scrap paper (with a blank area for writing)
    •An old magazine or other reading material that might contain interesting designs and be easy to cut out and use.
    •Something to trace with (This should be the size and shape that you'd like your tag to be...Look for something around your house that you could use)
    •A pen/pencil for tracing and writing
    •Scrap string
    •A staple-less stapler or appropriate adhesive

    What You Need to Do With All That Stuff I Just Listed:
    1.) Take the old magazine or other scrap reading material you've found and find an interesting design/drawing/background in it that could make for a cool looking tag. For me, I thumbed through an old Wired that my fiancée gave me the go-ahead to use (the last thing you want to do is cheese someone off by cutting up something they have no intentions of getting rid of). I found an interesting design inside, grabbed my tracing object and pencil, and traced around exactly what I wanted contained on my tag. In this case, I chose a genetically modified bell pepper because he looks pretty badass.


    2.) Grab that scrap paper now, and trace on a blank portion of it with the same tracing object you chose to use in #1, and then cut everything out!


    3.) Here's where staple-less stapler fun is to be had... Simply line up your design cut-out with your scrap paper cut-out (make sure the blank portion of the scrap paper is showing on one side, and your cut-out design is showing on the other), and slap em together with the wonderous staple-less stapler. If you don't have a staple-less stapler, you might opt to use an appropriate adhesive here instead.
    4.) Grab a pen or pencil now, and write whatever the heck you desire on the blank side of your tag. For mine, because I don't have official "business cards" for my eco-friendly shop, I simply wrote out my message and shop address with the best penmanship I could muster up, and will use it as both a tag and business promotional material.


    5.) Scrap string will come in handy now, to slip through one or both holes you've created with the stapler. I used scrap yarn from old knitting/crochet projects that I save. A crochet hook comes in handy for grabbing the string through the hole of the label and pulling it through, if you have one of an appropriate size lying around.


    That's pretty much it!!!


    If you want a more professional look you might opt out of the staple-less stapler and go for some adhesive or tape to hold the two pieces together. You might also have a stamp made that you can use to stamp these promo materials with your url, shop name, etc. Also for smoother edges, use an X-acto knife, by all means, when cutting these suckers out.

    Here's my finished result. Frankenstein Bell Pepper looks a little worse for wear, but he's wearing it well.


    -Kate
    EcoKate.etsy.com